Today the weather warmed up into the 40’s and I was anxious to try out my idea for modifying the defroster vents. Since I had already installed them into the dash I started by removing them. I used a 3/8″ deep socket and had them both out in just a couple of minutes.
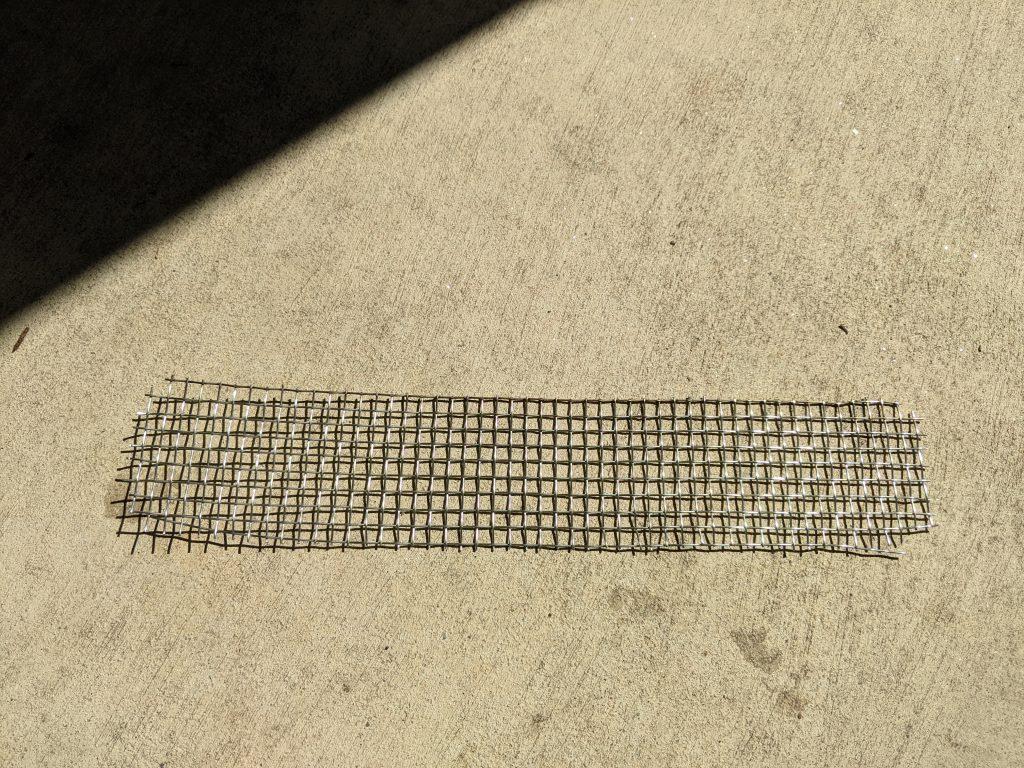
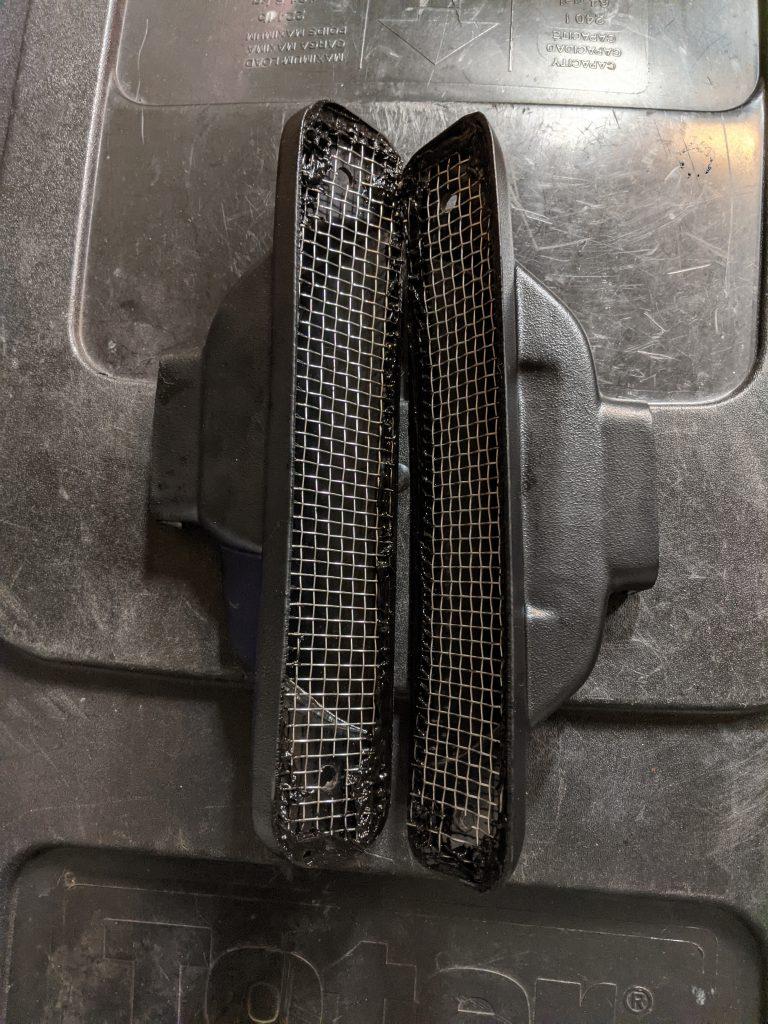
As a start in cutting out the inserts from the grate material I laid one of the defroster vents over the material and cut around it using a pair of side cutters. Once the piece was cut out a spent some time trimming and trial fitting it. This took a fair bit of back and forth but I finally ended up with a piece of grate that fit fairly well. After the final trim I ended up with the picture below.
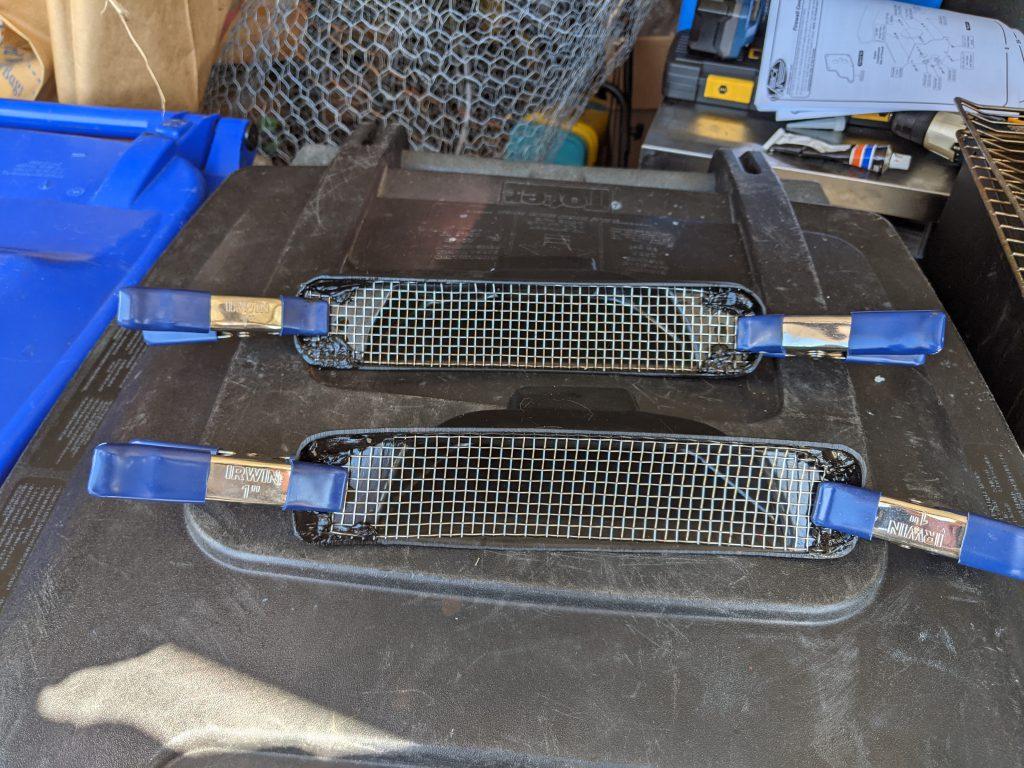
To attach the grate I had a couple of choices. I had some two part epoxy glue I could use. Or I could use some black RTV. I couldn’t see a compelling reason to choose one over the other and the tube of RTV was handy. So I used the RTV to secure the grates inside the defroster vents. I used some spring loaded clamps to hold the grates in place while I initially applied the RTV.
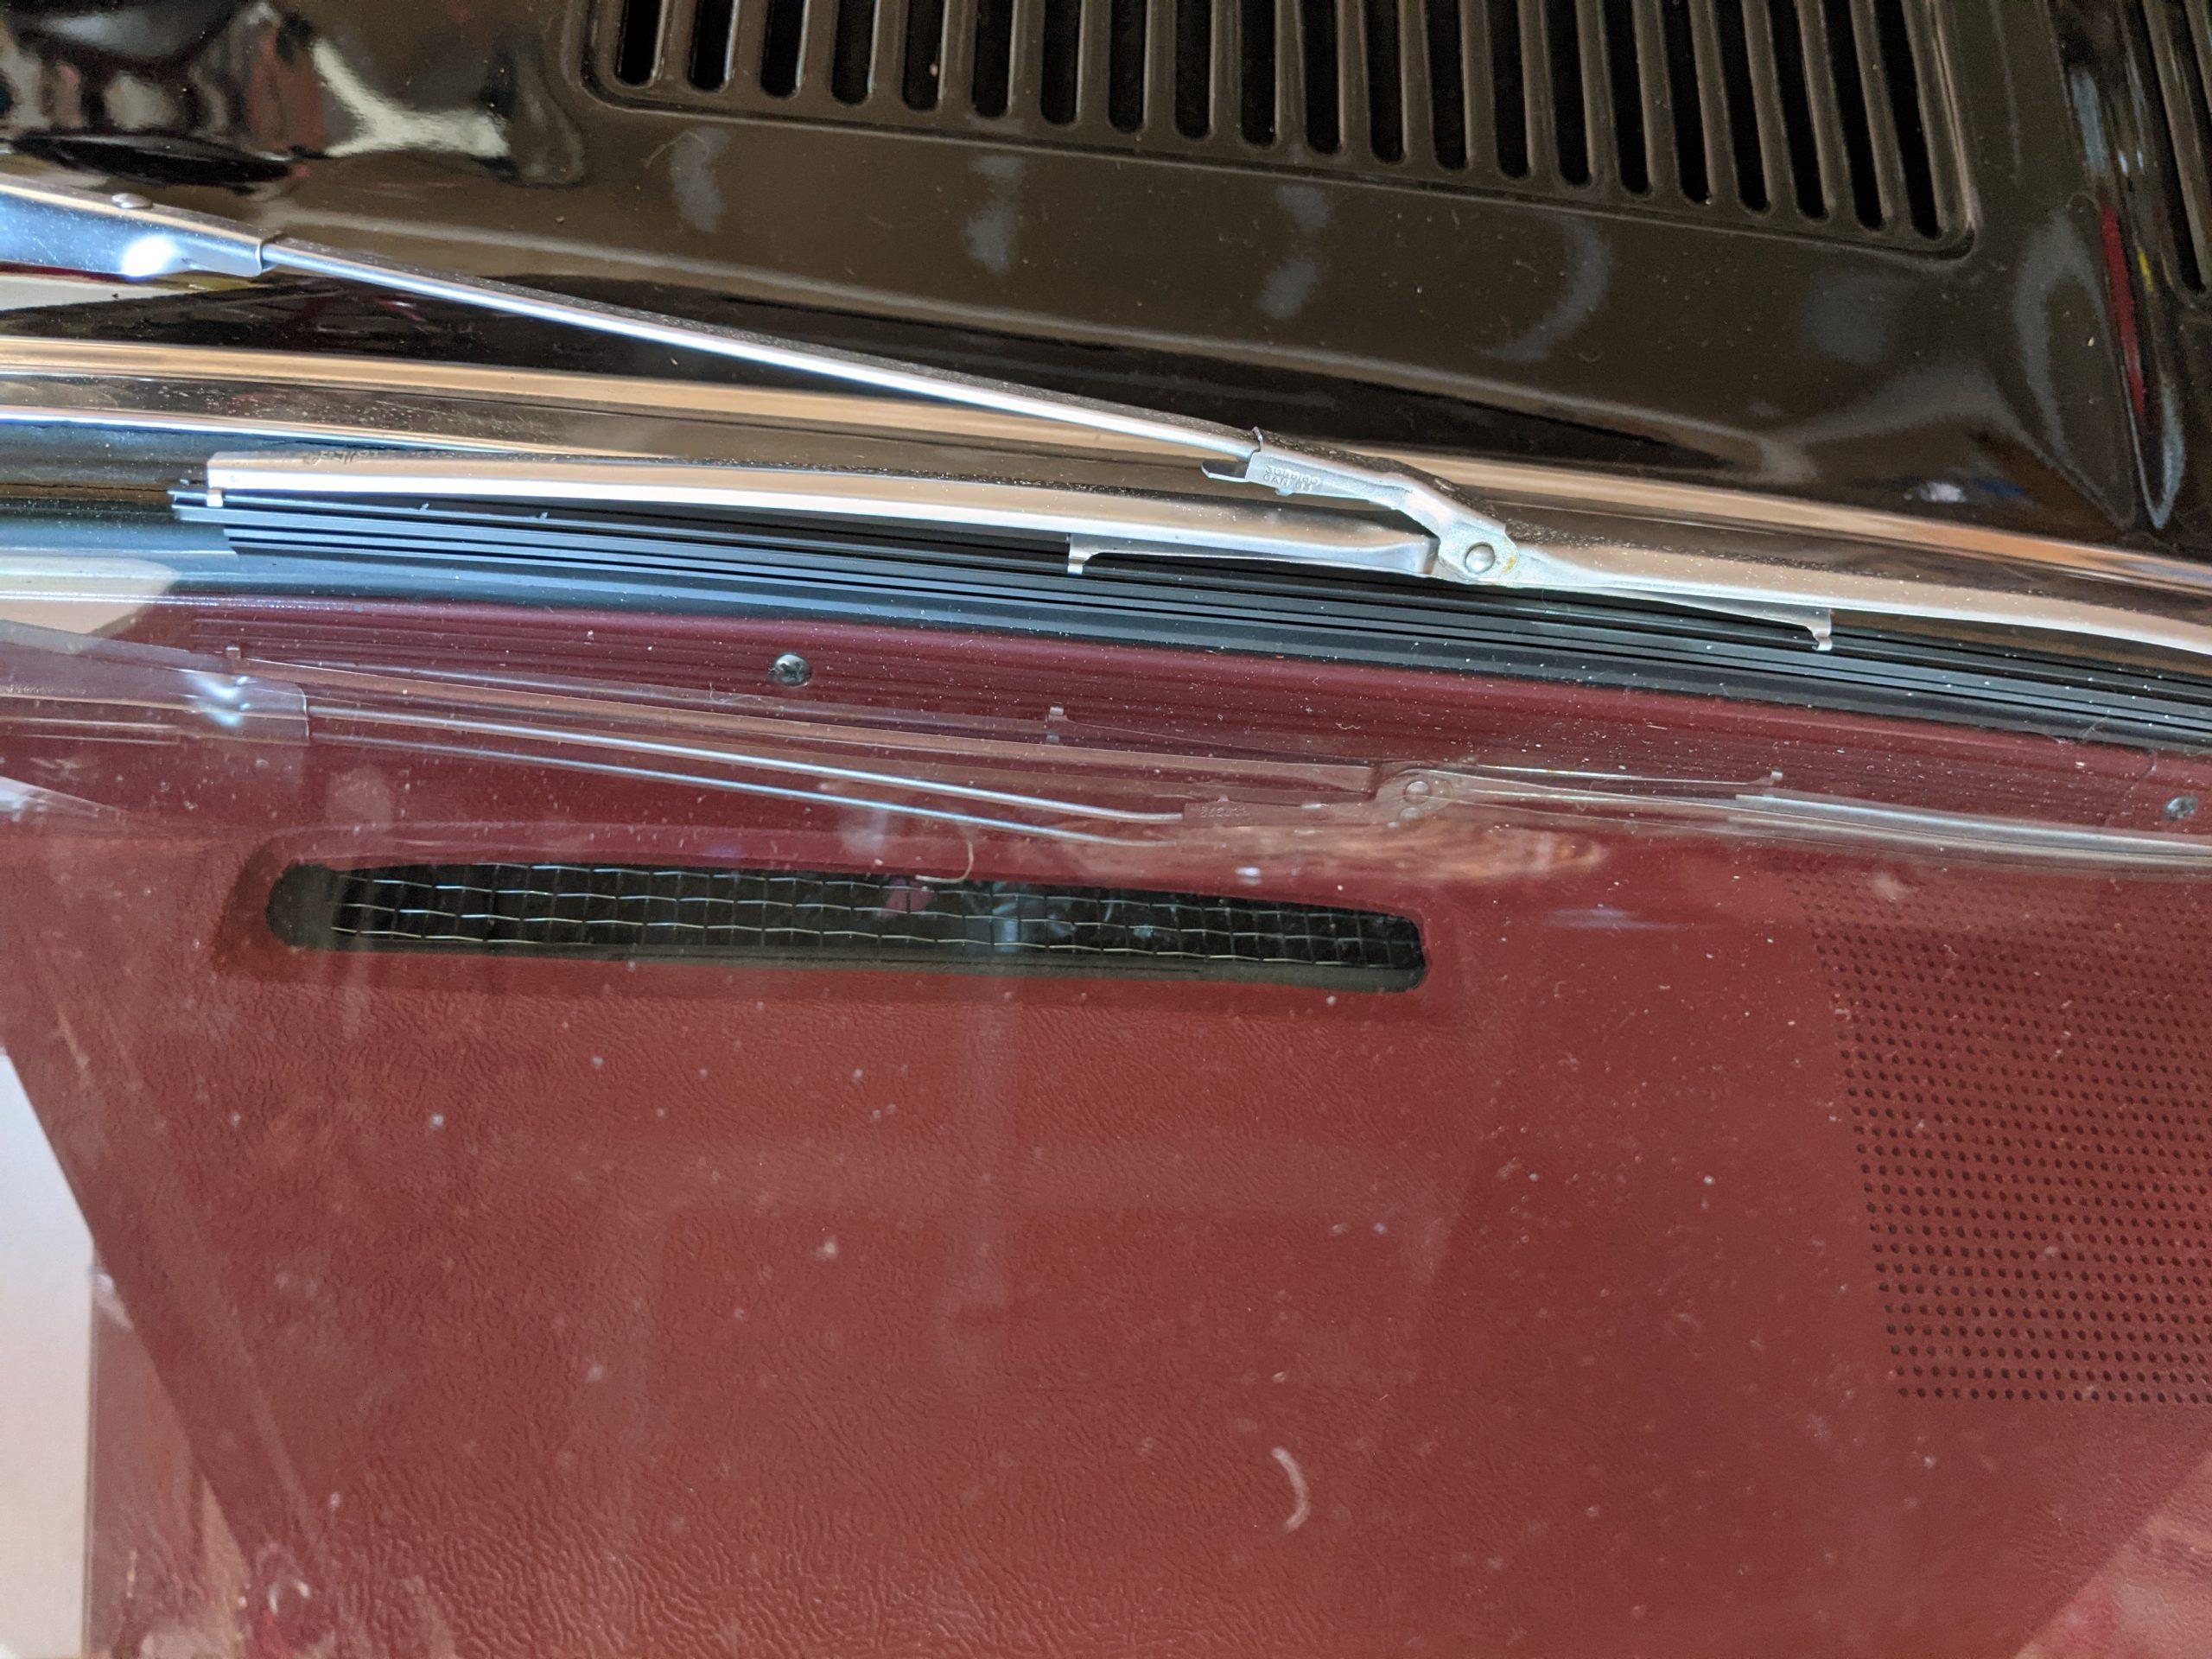
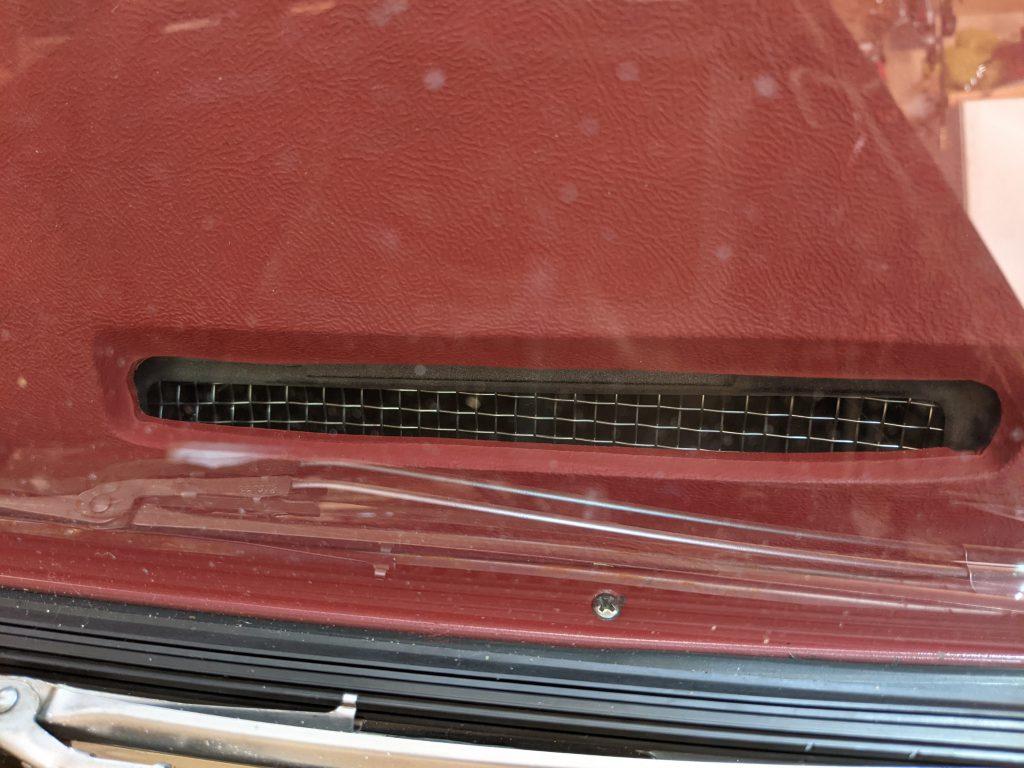
Later I removed the clamps and applied RTV all the way around the outer edges to make sure nothing could come loose and rattle. I also trimmed out the holes where the vents are installed. It isn’t the most beautiful job, but after I install them the edges with the RTV don’t show when looking at the vents through the windshield.
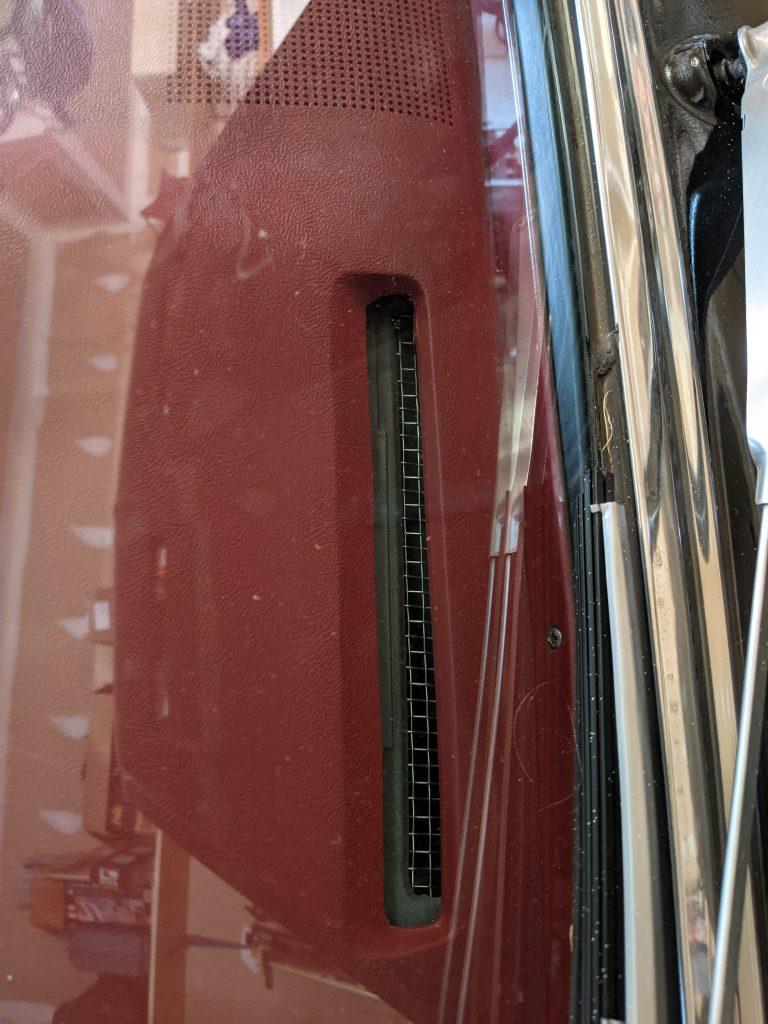
Here’s what they look like installed, looking through the windshield.
Update: Mar-10-2010
Looking over the documentation again I realized that the defroster vents have a right and left side. I hadn’t been able to see any markings or differences when I looked at them before but I removed them and looked at them more closely. A closer comparison revealed that they were slightly different. Eventually I was able to find the part numbers marked on the vents and reinstalled them in their correct places. Sorry for the poor photography