I pulled my original console off the shelf with plans to clean it up and reinstall it in the car. That plan fell apart when I inspected it and found several cracks and a few places where the plastic had broken completely off. Unfortunately I was unable to locate the broken off parts so I was unable to repair the console. I had seen where one online mustang parts vendor sold new console housings, but they no longer sold the part. My next plan was to contact a local parts vendor, Pony Express run by Dave. I had been to his garage/shed and I knew that he had several used consoles. When I called to see if I could purchase one of the consoles I got the bad news that Dave had passed away. While the parts were still there, the family didn’t have a handle on what he had, where he had it, or how much any of it was worth. I extended my condolences to the family and continued my search. I hope they get everything straightened out soon enough.
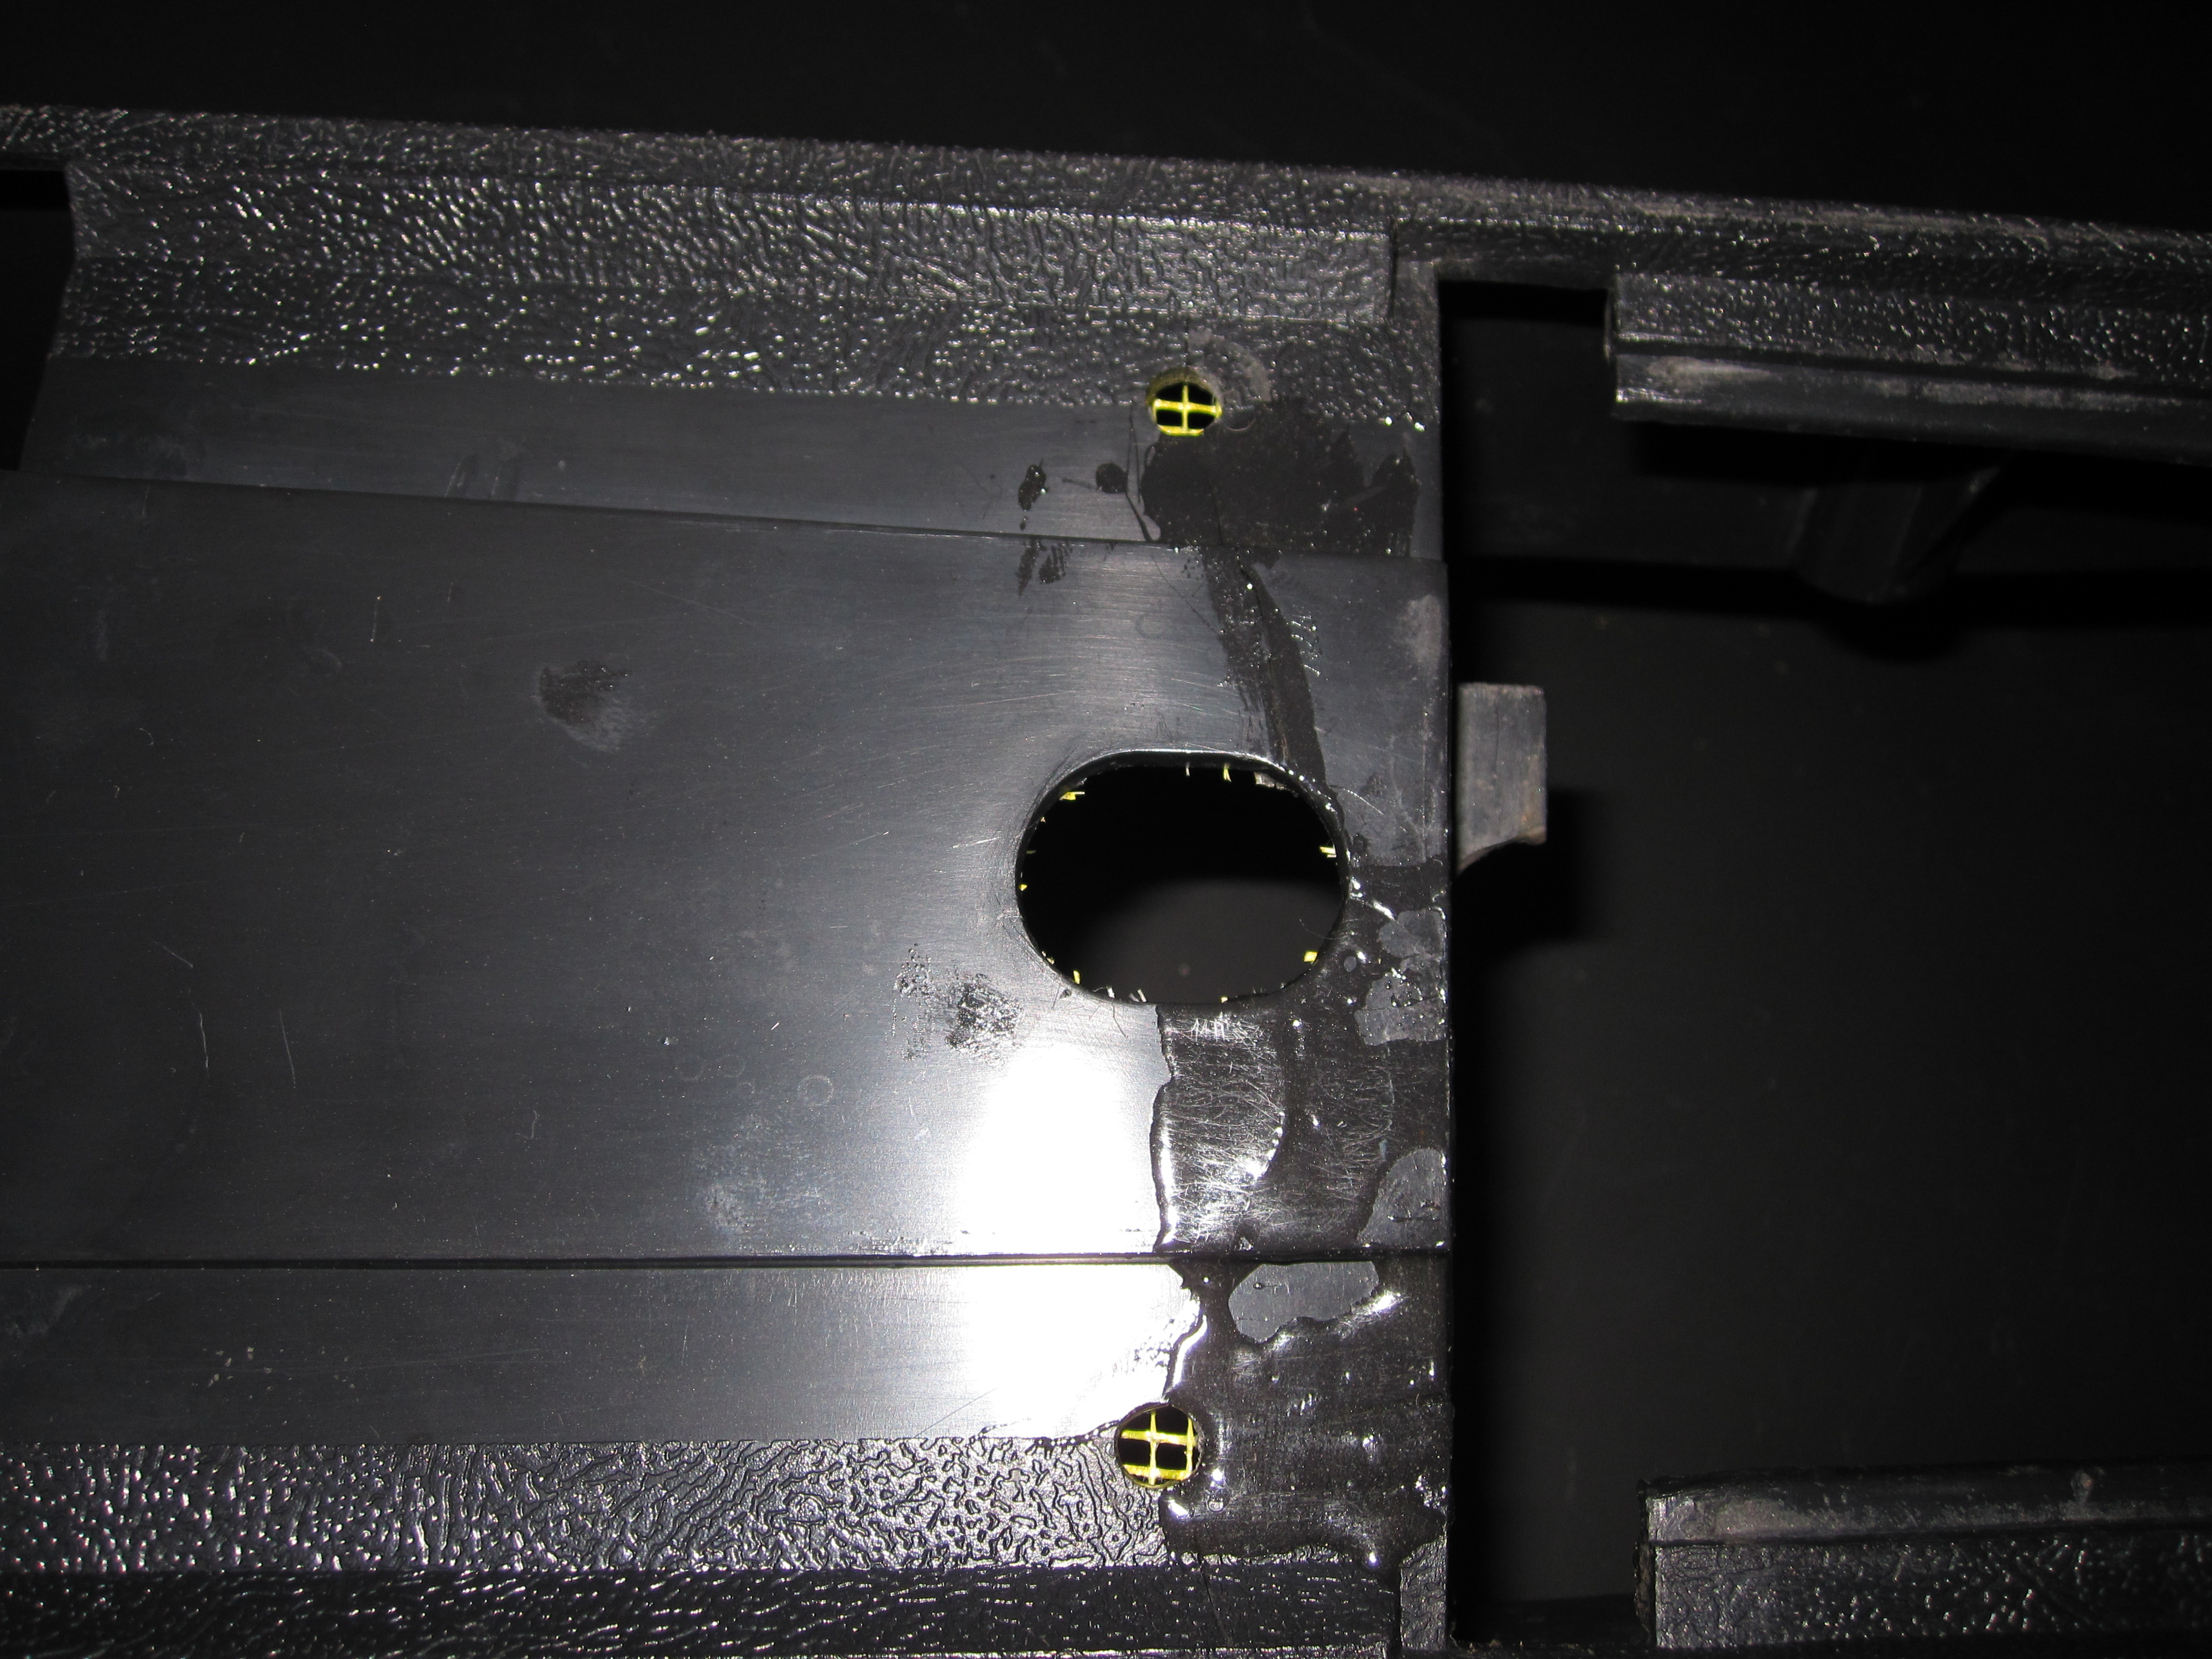
My next stop was a search on EBay. I searched daily for a couple of weeks. I did find a few consoles and console bases. One would have been perfect and the price was right. But somebody else got to it before I did. I also did some searching on the Internet. I located a base but it was in pretty rough condition, so I chose to pass on that one. I contacted Val because he had once told me he knew somebody with a console who might be willing to sell it. A couple of weeks later he sent me some pictures and an email address in case I was interested. There were two consoles pictured. They were a bit rough, but they looked like they could be patched and cleaned up. So I contacted the seller and eventually struck up a deal on a console base. It had one crack in the same place where several of the others I had looked at were cracked. It was also missing a small chunk of plastic. but the base included all the broken off pieces of plastic. I just had to assemble and glue together the jigsaw puzzle.
To repair the console I bought a tube of Loctite plastic epoxy. I used this to glue the console pieces back together. I also used it to fill the crack. I was surprised at how strong the epoxy was, and at how well the pieces fit back together. When I had finished the repair it was noticeable if you knew where to look, but I was happy with how the base looked. It still needs to be painted the correct color red to match the rest of the interior. I have the correct color paint on order from one of the Mustang parts vendors. That means I won’t be able to paint the console for a few days yet.
At this point I turned my attention to the old console base so that I could remove the old trim pieces. Most of the parts were in reasonably good shape for 45 year old parts. I did some cleaning and polishing, and then touched up the black paint using a black magic marker. The lenses for the lighting were cracked so I ordered replacements. I also ordered new rubber bumpers for the ash tray. All those parts should be arriving later this week.
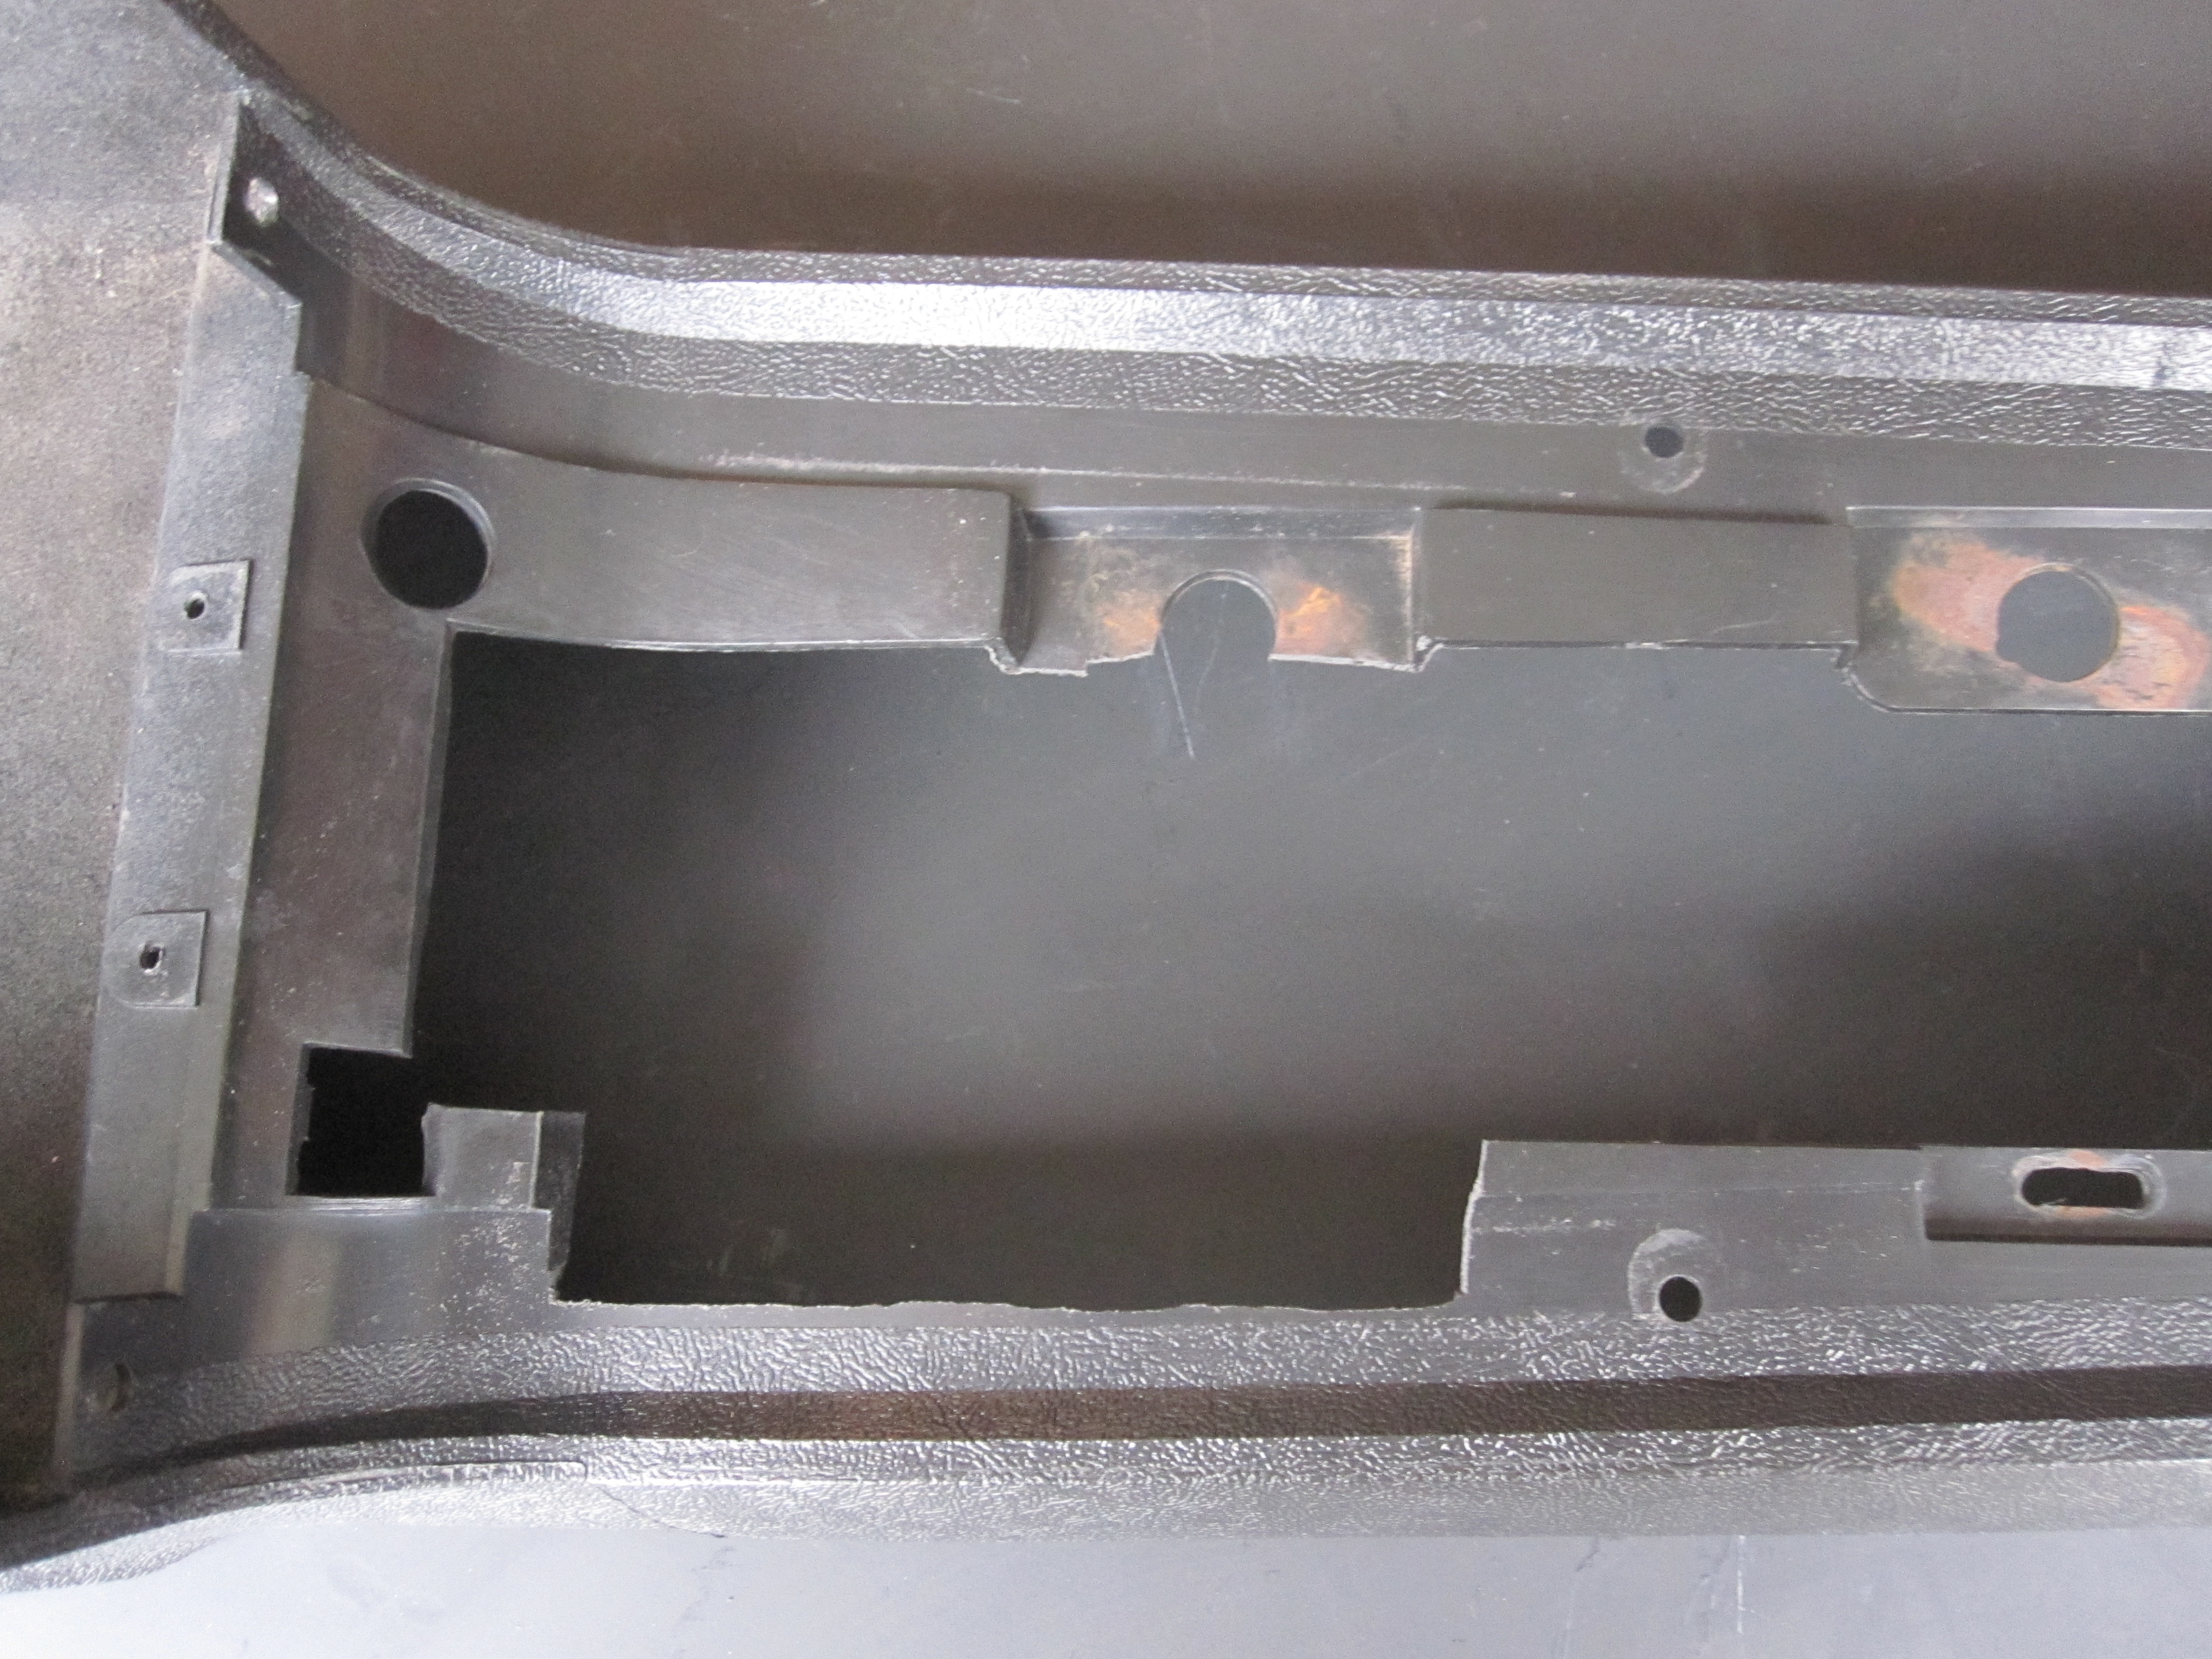
I decided to test fit the trim pieces to the new console base, which turned out to be a good idea. I learned that the console base was for an automatic transmission, and that it needed to be cut to fit the trim plate for the manual transmission. I was nervous about cutting the base, and did several comparisons between the new base and my old base before I decided to start cutting. Ford must have had somebody on the assembly line cut the consoles when needed. I used a hacksaw blade with my hands to make the cuts. It now matches my old console base in that area and the trim plate fits fine.
While everything was taken apart I checked all the wiring. It is fine with no shorts or bad connections. I was missing a light bulb for the light that goes inside the console drawer. I looked it up in my reprint of the owners manual and picked up a new bulb at the local auto parts store.
At this point in time I’m just waiting for my parts to arrive so that I can finish up the console restoration. That means I may not be able to get back to work until sometime early next week. In the mean time I’ll try and snap a few pictures showing my repair and cut jobs on the console base.
Update: I’m adding a few pictures of the console base with my repair and trimming.