I checked in to see how my car was progressing and found out that the biggest reason for the steering play was due to the steering coupler that was installed on the car. It had several issues. First, it was installed incorrectly and could come loose while driving the car. That was bad enough, but there was still more. The steering coupler on the car had some type of polyurethane insulator on it that had deteriorated over time and had pretty much fallen apart. This part was not an original Mustang part, but I had purchased it at the Ford dealer as a genuine Ford part that was a replacement for the 60’s Mustang part. Val said he had never seen one like it before and had never seen one where the insulator had just fallen apart into pieces. The original coupler wasn’t useable as half of the splines inside it were ground away. That was probably the reason I replaced it many years ago, but i honestly don’t remember. Val said the bad steering coupler accounted for most of the play in my steering. He also told me that he’s been tied up with another car and should be getting back to working on mine later in the week.
Category Archives: Mustang
First Day at the Shop
My car was towed to the shop on a Friday. I didn’t expect to hear much of anything until the middle of the next week as I knew that Val was working on several cars at once. To my surprise and delight I received a call the next Monday afternoon. The first item to discuss was the brakes. Val had removed the master cylinder to see where I had gone wrong. It turns out there were two issues. The first problem was that when the push rod fell out of the brake booster I didn’t install it back in correctly. So when the brake pedal was being depressed it wasn’t pushing on the master cylinder. Hence no brake pressure. After correctly installing the push rod there was pressure in the rear brake lines. However there was still no pressure in the front lines.
Val said that he spent some time loosening up and tightening fittings trying to track down where there was and wasn’t pressure. After spending some time doing this he was able to narrow the problem down to one of the flexible brake lines that connects to one of the front calipers. Although the hose looked fine on the outside, it had deteriorated on the inside enough to block any brake fluid from getting through, even with the amount of pressure that the master cylinder was capable of producing. This problem wasn’t unheard of, but was something that neither Val nor I had ever experienced. Val put in an order for all new flexible brake lines so that he can replace all of them. Hopefully that will square the brakes away.
Next item for discussion was the steering. There was a bit of play in the steering that needed to be addressed. There was also a problem with the rag joint that connects the shaft in the steering column with the steering box. I was able to locate the original rag joint and I mailed it off to Val. He planned to pull the steering box and inspect it on the bench. Then he would call me and give me the options for repairing or replacing it. If it was rebuild-able that would be one option. If it required replacing then some additional options might be available. Several companies make power steering conversions for that car that use more modern steering components. What parts needed to be replaced and how expensive they were would dictate what path to take. But I can tell you that a power steering conversion with modern components really sounds pretty nice.
As far as rust on the car goes, it wasn’t anywhere near as bad as I had thought it might be. No structural rust issues cropped up. There was some surface rust underneath, and there might be a few spots that would require either welding in patches or just cleaning up and coating with a rust preventative. I found that very encouraging because even though I thought the car was pretty much structurally sound I always had the nagging feeling in the back of my mind that the car would be deemed too far gone to fix. Hearing that there were only very minor rust issues was the best news I could hope to receive.
I’m still waiting to hear back about the brakes and steering. Right now the car is waiting for the brake lines to come in. Hopefully I’ll have more to report in a few days.
Bleeding On The Brakes
It was time to start diagnosing the failed braking system. A quick visual inspection showed there was no fluid in the master cylinder. The system is sealed (or at least it is supposed to be sealed), so the fluid had to have leaked out somewhere. Looking at the back of the master cylinder where it bolted to the power brake booster assembly I saw quite a bit of corrosion. It looked like the master cylinder had been leaking. So I set out to remove and replace the master cylinder. I’ve done this job before on this car so I felt fairly confident in my abilities to perform the task correctly.
One thing that had been bothering me for some time is that the master cylinder on the car was a different form factor from any of the others I’ve used in the past. This master cylinder is an inch or more wider, which leaves very little clearance around it. This became an issue when I tried to remove it. I ended up having to remove the driver’s side valve cover to get enough room to maneuver the master cylinder. When I did finally get it removed from the car it showed signs of leaking in the back.
I purchased a new master cylinder at the local auto parts store. This one matched the form factor of some of my past master cylinders, so I was much more comfortable with it. It was also much easier to wrestle back into position and bolt on. In the process of removing the old master cylinder the push rod in the booster fell out. But I put it back in and bolted everything back together. Then I ran into my first snag. I was unable to get one of the brake lines threaded into the master cylinder. I struggled with it for several hours, and then gave up for the day.
The next day I decided to remove the master cylinder and brake line and assemble them off the car. Then I installed the master cylinder with the line already attached. That all went fine except that the push rod in the booster fell out again several times. It was also a challenge to attach the brake line to the distribution block, but that went a lot better than the previous day’s challenge of attaching the line to the master cylinder. Everything was now buttoned up. I didn’t have enough time to move on to bleeding the brakes, so I left that for the next chance I had to work on the car.
When I did finally get around to bleeding the brakes I had no pressure. I spent quite a bit of time with a vacuum pump but had no success. When my son came home from school I asked him to pump the brake pedal for me. Still no success. Finally i loosened up the brake lines at the master cylinder and pumped the pedal. Still no pressure. I was out of time once again so I left it for another day.
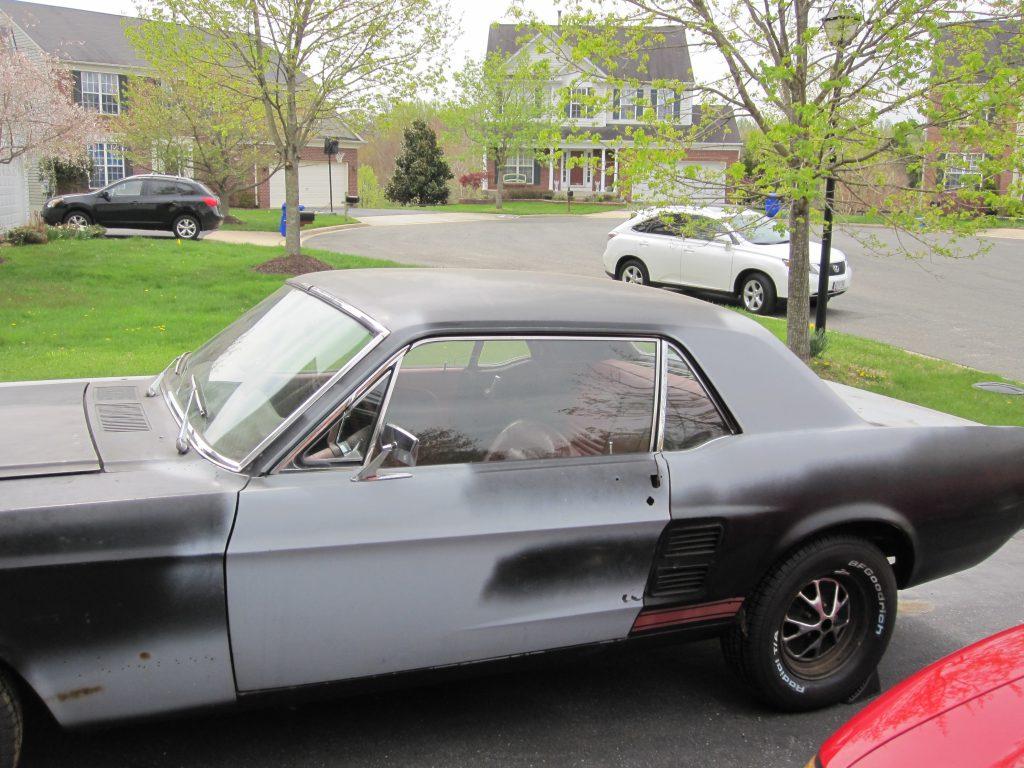
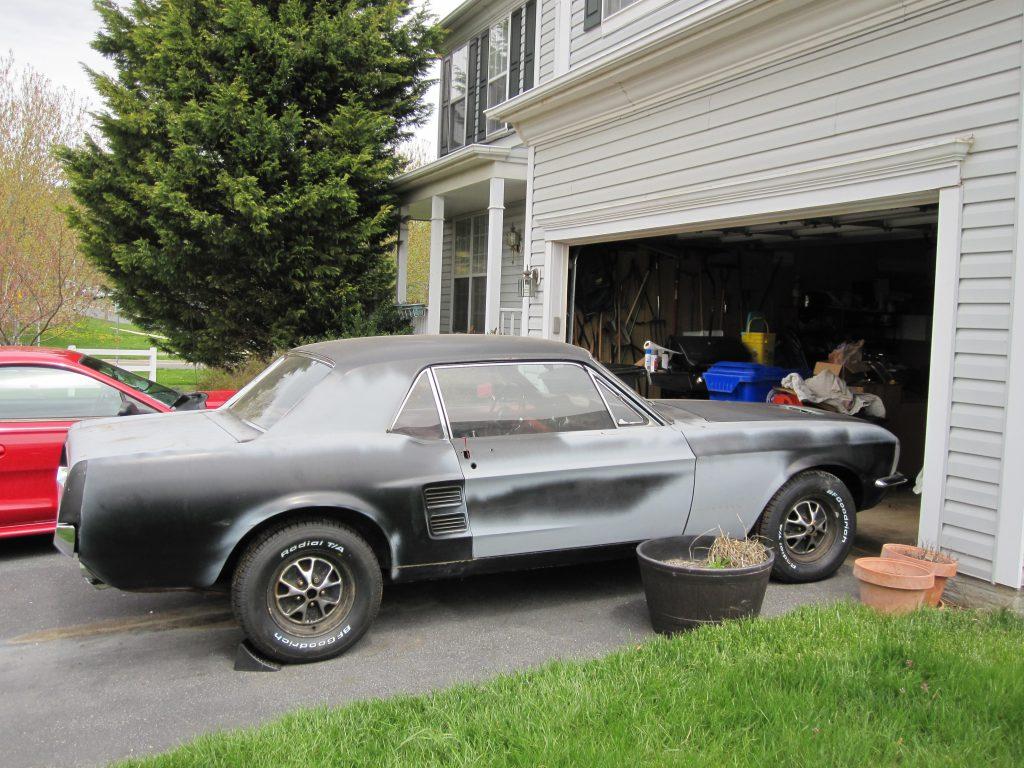
Another day never arrived because I got a call from Val who said he was ready to work on my car. He came over to my house and we pushed the car out of the garage. The car hadn’t seen the light of day in so long that I think it blinked a few times from the brightness of the sun. Here’s what the car looked like as it was coming out of the garage.


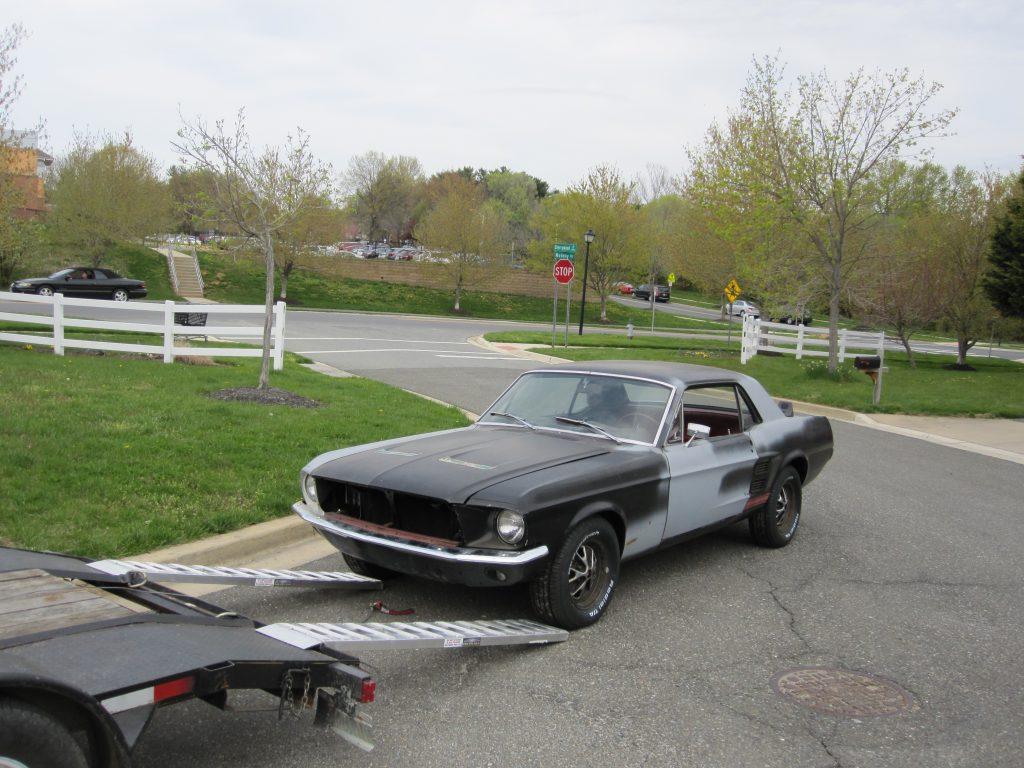
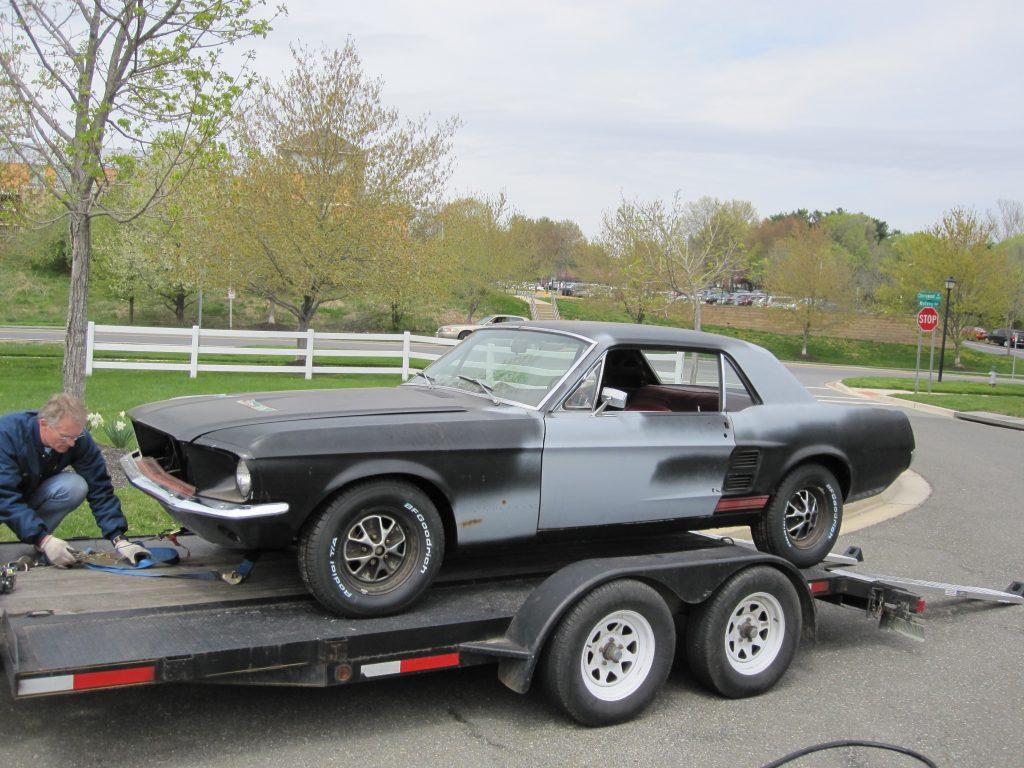
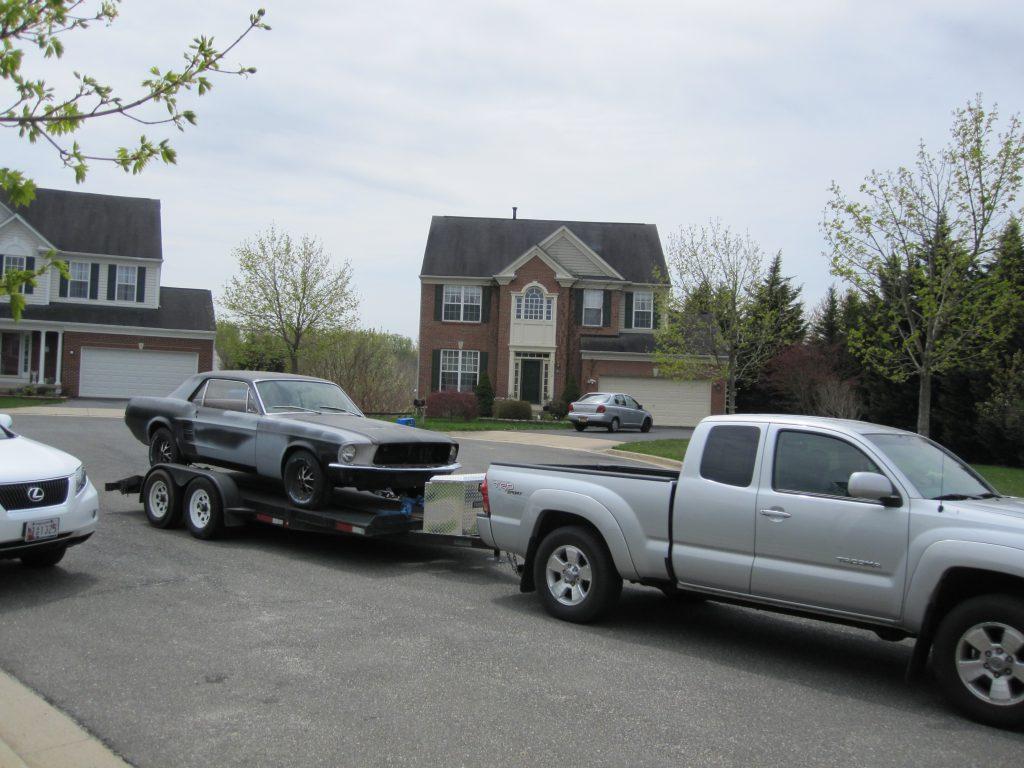
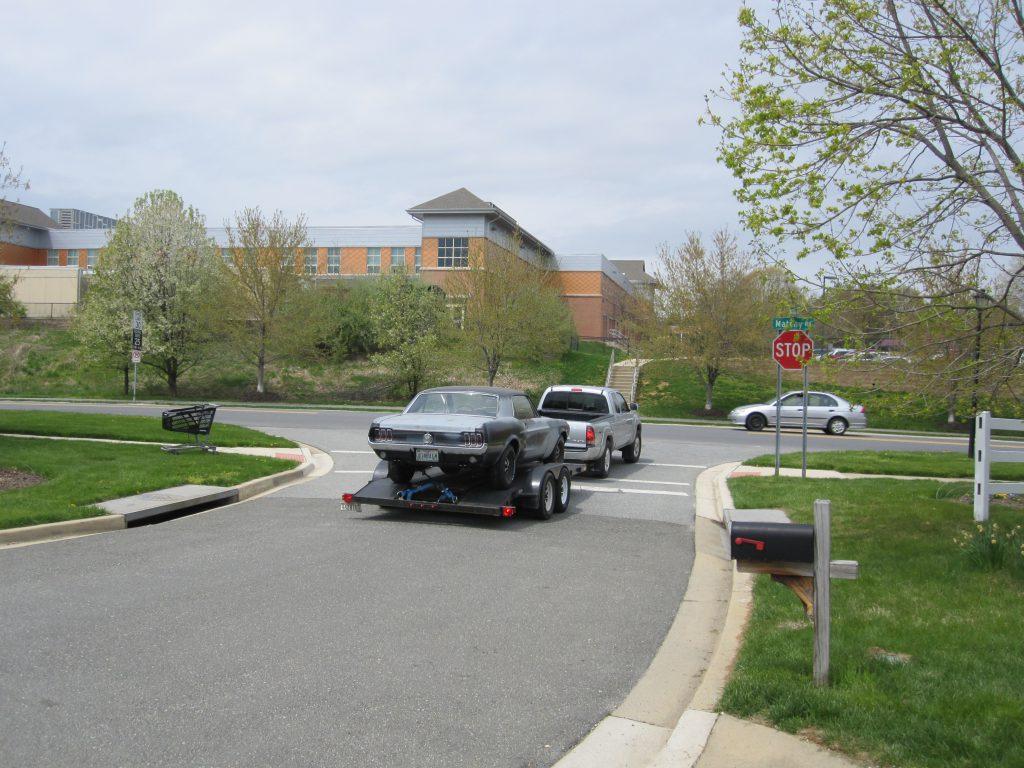
Once it was out of the garage, Val looked the car over. I shared with him my list of goals and tasks for the car. After we talked for close to an hour he put the car on a trailer and towed it away. Here’s a few more pictures showing the car going on to the trailer and sailing off into the sunset.


After Val has had a chance to fully assess the car I’ll post the results. His first task will most likely be to finish up my unfinished brake job.
Getting Tanked
I continued working on cosmetic stuff while I was waiting for my car to go into the shop. I painted the rear quarter interior trim panels. I also painted the ash tray and trim that goes across the top of the dash pad. Then I spoke with the mechanic who is going to work on my car. He asked me why I’m not driving it yet. I pointed out that he had told me to hold off on installing the gas tank until he could work on the rusted trunk drop off. Eventually he convinced me that I could install the gas tank without caulking it. That would allow me to test drive the car but make it easy to remove the gas tank again for the rust repair. The other bonus is that I could possibly drive the car to his shop and save myself the towing charge. After some thought I realized that this was a good plan.
I went ahead and bolted the tank into place without using the strip caulk that goes between the tank and the trunk. Then I made a trip to the local gas station with my lawn mower gas can in hand and purchased a couple of gallons of gas.I poured the gas into the tank and noticed a slow drip coming from the fuel gauge sending unit. I drained the tank and removed the sending unit. After checking the o-ring I reinstalled the sending unit and poured the gas back into the tank. It still leaked. Time to drain the tank once again and check the sending unit. This time I used some light grease to hold everything in place and tried again. It still leaked. By this point i was getting good at the drill of filling and draining the tank.
I was getting a little frustrated but decided to give it another try. This time I used some silicone to hold the o-ring in place. I reassembled everything and tried again. It still leaked. I drained the gas and disassembled it once again. Finally I carefully cleaned everything and applied a liberal amount of silicone sealer to the o-ring, the gas tank, and the sending unit. After reassembly I added what I had left of my gas. This time there was no leak. I started the engine and let it run for about 5 minutes to make sure gas was flowing from the tank and the gas level was actually up to the sending unit. No leaks and the engine continued to run which indicated gas was flowing from the tank.
Now I felt I was ready to attempt a very short test drive. or so I thought. I got in the car and put my foot on the brake pedal. It sank right to the floor. The car had no brakes. So now I had another project to tackle. Diagnosing the failed brakes. That was now next on my list of things to fix.
Cosmetic Stuff
The weather warmed up a bit and I decided it was time to try and get a few odds and ends squared away. The major jobs that need to be done mostly hinge on the work I plan to farm out. Since that work is on hold until April I chose to work on some cosmetic items that don’t really impact getting the car running very much.
The first thing I chose to address is the fact that the ignition coil is mounted facing the wrong way. I had attempted to turn it around to face the correct direction, but ran into interference with the hard fuel line. Today I removed the hard fuel line and adjusted it to gain a little more clearance. I also needed to shorten the flexible fuel line to help gain a better angle. This barely gave me enough room to turn the coil around and mount it. Things are fitting pretty tight but it is workable.
The voltage regulator that was on the car is a replacement that was installed by the restoration shop 15 years ago while they tried to diagnose my charging system. The one they installed is functionally equivalent to the correct one for my car but it differs cosmetically. The correct one for my car is black with silver lettering. I had a brand new one on the car before they swapped it out. The one they install was blue with yellow lettering. I swapped my old voltage regulator back in. I also had a set of mounting screws that were unmarked by the vendor I purchased them from 15 or so years ago. I thought they were for the starter solenoid and the voltage regulator but I couldn’t remember for sure. I should have marked them, but I never expected it to take over 15 years to get around to installing them. When I compared and test fitted them they were correct, so I replaced the rusty original hardware with the shiny new hardware.
The horns that had been on my car didn’t work because somebody played a prank on me back about 30 years ago. Somebody sprayed WD40 into the original horns and they never worked again. I’ve tried to replace them several times, but the replacement horns I ordered never seemed to match the originals very well. The set I ordered this time looked really close to the originals. At least until I tried to install them. The holes in the mounting brackets were drilled slightly off. I debated whether I should return them or try to re-drill the holes. I ended up making new holes and then installed them using the new hardware I purchased. The fit still isn’t as good as the originals, but i now have working horns.
The last thing I chose to do was to start stripping the paint off of the interior rear quarter trim panels. My original panels disappeared while the car was in the restoration shop. I purchased some used ones at a local Mustang parts dealer. My car has a red interior and the replacement panels I bought were colored black. That meant I needed to repaint the panels. But before I could repaint them I needed to strip off the old black paint.
I had some paint stripper, but I had heard that oven cleaner worked well to remove paint. I tried it on one of the panels, but the paint wasn’t affected. So I moved on to the paint stripper. The first application of stripper removed a fair bit of the paint, but not enough. I applied a second coat of the stripper. That removed quite a bit more of the paint. I cleaned off the panels using isopropyl alcohol and some fine steel wool. A lot of the paint was removed, but there were still some stubborn spots. I was out of time, but I’ll try using a wire wheel in my drill to see if I can get them a bit cleaner and also try to strip off some of the surface rust. Once I get the metal prepared I plan to spray on some self-etching primer and then the correct red color.
Universal Joint
We had some more nice weather and I had the opportunity to do a little more work on the car. There isn’t really a whole lot to say about the work I did, so this post will be fairly short. My time to work on the car is limited for several reasons so I’m only attempting to tackle small jobs each opportunity I get to work on the car. Once Spring is here in full and I get past some other pressing issues the work should move a lot faster.
My goal for this session was to replace the rear universal joint. I knew the one currently in the car was bad since I’m the one who got the needle bearings out of place when I last installed the driveshaft 15 years ago. I thought I had gotten everything correctly in place, but there was a vibration when I drove the car. I had a new part in my parts inventory so I was ready to go with the replacement.
I placed wheel chocks in front of and behind the front wheels, raised the rear of the car, and put jack stands under the rear differential. With the car safely supported I slid myself underneath, tools in hand. I thought this job would give me a good chance to use my ratcheting box end wrench set. Unfortunately there wasn’t enough clearance around the universal joint retainers to use the wrench. I used an open end wrench to loosen and remove the retainers. That permitted me to remove the rear universal joint and slide the driveshaft out of the transmission tail housing.
With the driveshaft out of the car I removed the clips holding the universal joint in place. Then I took a pair of sockets and used my bench vise to push the u-joint end caps out of the driveshaft. I took my new u-joint, removed the bearing caps, positioned it in the driveshaft, and pressed the bearing caps into place. Then I installed the new clips to hold the bearing caps in pace. Everything moved freely, so I cleaned off the transmission yoke end of the driveshaft and slid it back into the transmission tail housing. Using my new retainers, I installed the rear u-joint into the rear differential and bolted everything into place. Since the car has no gas tank I couldn’t take it for a test drive to make sure the installation was completely successful.
That probably sounds too easy, and if you thought that you are correct. The driveshaft install went fine and I would be done except for the fact that the rear end had fluid dripping from it. That means there is a leak and it needs to at a minimum have the seals replaced. In order to do that, the driveshaft will have to come out once again. Not a big deal job to remove it again, but nobody really likes doing a job twice.
As to the fluid leak, I was actually already planning to have the rear differential rebuilt. It hasn’t been touched since I bought the car in 1974. I’m betting that whatever fluid is left inside it has been there untouched since the car was manufactured in 1967. I also know that this car was originally equipped with a “traction lock” differential, which is Ford’s trade name for a limited slip. On some occasions the limited slip would work. On others it would behave as if I had an open differential. I would be ecstatic to have it work as expected, but that repair is beyond my abilities. So this job will have to wait until the car is towed to the shop and I can have it professionally rebuilt. I’m hoping that will start sometime in April, but I never really know for sure what kind of stuff will happen to delay that shop visit once again.
Between now and then I plan to work on some fairly easy cosmetic stuff. The weather is turning cold again and the weather service is predicting some more snow. So it may be a few days to a week before I get much more accomplished.
Diagnosing The Tachometer
I planned to pull the drive-shaft and replace the universal joint today, as the weather prediction said it would be n the mid 50’s with a 0% chance of rain. Unfortunately it was in the 40’s and raining when I had a chance to work on the car. So I switched gears and decided to work on a problem I was having with the in dash tachometer.
The factory tachometer for the Mustang is a different design than the typical tachometer. It is installed in series with the positive side of the ignition coil. Most tachometers connect to the negative side of the coil. Since this tachometer is in series with the primary ignition circuit, if it fails the coil will not receive any voltage. It also requires a ballast resistor with a resistance of 1.5 ohms, which on the mustang is in the form of a nichrome resistance wire that is located between the tachometer and the primary side of the coil. For a more detailed description and wiring diagram, there are several resources on the Internet. One I can suggest is The Tach Man who also repairs and calibrates the factory tachometers. I haven’t used his services, but there is some good information on his page.
My car did not originally come with the factory tachometer. I added it many years ago. The under dash wiring harnesses were different for cars with the factory tachometer, and are very difficult to find. When you do find one it will be very expensive. So I chose to modify the wiring myself, as there really aren’t that many differences between the two. I made the changes and everything worked for years.
Then I took the car into the last restoration shop, who saw that I had done my own wiring and were adamant that it could never work. It didn’t seem to matter to them that I had been driving it that way for over 10 years and it was working fine. They said it absolutely had to be rewired with a factory harness. The clincher for them was that I had just installed a new engine at that time and when I started it for the first time the charging system didn’t work. After they “looked at it” the alternator wiring harness melted. They replaced it with a new harness and went to work from there, replacing the under dash harness, the engine compartment harness, and the voltage regulator to no avail. Finally they replaced the alternator, which was most likely the original problem, and the charging system worked again.
With the charging system working I checked the tachometer and gauges and they all appeared to be working. It wasn’t until much later that I observed that the tachometer wasn’t displaying the correct engine RPM. It consistently read low, and seemed to be limited to about 2500 RPM maximum. The car went into its’ 15 year garage vacation at that point and I never had a chance to look at the problem until now. The fix turned out to be very simple.
When the new engine had been installed.I replaced the ignition coil with an aftermarket high performance coil. What I hadn’t realized was that coils have different primary resistance values. I had several factory coils including my original one. They all measured 1.5 ohms primary resistance. The new ignition coil measured 3.0 ohms resistance. Since the tachometer is wired in series with the positive primary side of the coil and the ballast resistance wire the resistance affected the tachometer reading. Factory stock would be 1.5 ohms for the ballast and 1.5 ohms for the coil. Now I had 1.5 ohms for the ballast and 3.0 ohms for the coil. I purchased a new Pertronix coil with 1.5 ohms primary resistance and installed it. Lo and behold the tachometer now appears to read correctly. When I have a chance I plan to hook up my tachometer/dwell meter and compare the readings with the factory tachometer. But for now I’m happy that my tachometer is reading a lot closer to the correct engine RPM. That and I have a nice new coil.
Maybe tomorrow I’ll get the opportunity to work on the universal joint, weather permitting.
Keeping It Breathing
When I initially started the engine I hadn’t installed the new gas tank yet, so it was running off of the gas in the fuel bowl only. When the gas in the bowl ran out it would stall. I came back with the plan of inserting a fuel line into a gas can and running that to the fuel pump inlet, creating a temporary fuel source. I wanted to keep the engine running long enough to warm it up and adjust the timing. I filled up my gas can and ran the hose to the fuel pump. I primed the fuel bowl and started the car up. It ran for a minute and then ran out of gas. I repeated the process of priming the fuel bowl and starting the engine 4 or 5 times with the same results. I checked the sight plugs on the carburetor but fuel didn’t seem to getting there. I tapped on the needle and seat to try freeing it up in case it was stuck. I started the car again but still no joy. Time to do some diagnosing as either the fuel pump wasn’t working or the needle and seat were stuck.
I removed the fuel line from my gas can and placed the nozzle of my squeeze bottle of gas into the fuel line. I suspended this above the engine compartment so that gravity could feed the gas. I primed the fuel bowl and started the car again while watching for any fuel flowing out of the squeeze bottle. The engine ran out of gas once again and stalled. I tried it with my finger over the gas line to see if I could feel any suction created by the fuel pump. That test failed as well. I was beginning to suspect a bad fuel pump. I removed the fuel line from the carburetor to see if any gas was getting up to the engine. The line looked dry.
At this point I remembered that I had a vacuum gauge that could also measure pressure. I bought it back in the 1980’s and only used it a few times as a vacuum gauge. I had forgotten about it and even more importantly I had forgotten that it also measured fuel pressure as well as vacuum. I attached the gauge to the fuel line and cranked the engine. At first there was no pressure, but then it rose to 3 psi and finally made it to 4 psi. Some gas started sputtering out as well. So it looked like my fuel pump was working. My next suspect was a stuck needle and seat.
I hooked the fuel line back up to the carburetor and gave the needle and seat a few more taps with the handle of a screwdriver. Then I primed the float bowl and started it once again. It sputtered a bit when it started to run out of gas, but then the engine sped up and kept running. I let it idle for a few minutes and it smoothed out pretty well as it warmed up. The fuel pump and carburetor were working as intended.
I let the engine warm up and made sure the cooling system was working. The temperature gauge sat at about where I remembered from the past when the engine was warmed up. The radiator and hoses got warm so I knew the thermostat had opened. And the thermostatic fan clutch stiffened up and caused the fan to turn faster. There was a fair bit of smoke coming up from both sides of the engine. I shined a flashlight down both sides but couldn’t see any obvious oil leaks. My guess is that I dripped some transmission fluid onto the exhaust manifolds when I squirted it into the spark plug holes. The smoke is just the transmission fluid burning off of the exhaust. If so it should burn off and stop smoking.
After the engine warmed up and the choke came off I shut down the engine and grabbed my timing light. I started the engine back up and checked the timing. It was set slightly retarded. I shut down the engine, loosened the distributor clamp and started it back up. I advanced the timing a few degrees, shut it down, and tightened the distributor clamp back down. Starting the engine and double checking my work showed the timing right where I wanted it. I may advance it a few more degrees after I test drive the car and see how it runs and whether it pings. But for now I’m satisfied that the engine is ready and waiting for action. I’m also fairly confident in the starting system and the cooling system, although I do need to change the 15 year old coolant even if it is still green. The charging system appeared to be working as well, but i need to do some further testing before I’m fully confident that it is working properly.
There’s still plenty of work left to do. Next up on my list is a replacement of the rear universal joint. That shouldn’t be a terribly difficult job. But I’ve regretted using those words before so I should probably wait and see how it goes.
The Patient Lives
I haven’t had much free time lately, and when I have the weather hasn’t been all that good. Today was a nice spring-like day with warm weather and a slight breeze. I was busy all day until around 6:00 PM or so when I had a few free minutes. I’ve been thinking a lot about starting the old car up and was determined to at least hear it fire up once before the weekend was over. I had already purchased and installed a new starter solenoid from the Ford dealer so I was ready to continue. I went out to the garage with the intention of just seeing whether the car would start up or not. I knew I didn’t have a lot of time for tuning or diagnosing the fuel system. So my plan was a very simple one. Fill a squeeze bottle with gas, use it to fill the primary float bowl with gas, and fire the engine up.
I went to retrieve my gas can and saw that there were a few items directly behind the car that might block the exhaust and force any smoke (and I definitely expected some) back into the garage. So my first step was to clear that stuff out of the way. Then I filled the squeeze bottle with some of the gas I keep for the lawn mower. It is only regular octane, but I didn’t see this as a problem since I wasn’t planning to drive the car. Then I used the squeeze bottle to carefully fill the primary fuel bowl of the carburetor with gas through the overflow vent tube. I made sure to be careful and not spill any gas this time.
The “moment of truth” had arrived. I didn’t even bother to sit in the driver’s seat so I could work the pedals. I’m not sure if this was because I expected the engine to start up so easily I didn’t need to or was so convinced that it wouldn’t start that I didn’t bother to get in. I think it was more the first reason. Anyway, I reached in through the driver’s side window, turned the key, and the engine immediately sprang to life. I was half astonished and half elated. I would have expected it to stall the first time but it didn’t. There was plenty of blue smoke and the idle was a bit rough but they both cleared as the engine ran. I let it idle until it ran out of gas and stalled.
I waited a minute or two for the smoke to clear. Then I filled the bowl a second time and started it back up. Again it started immediately. I stuck my head in the car and all the gauges appeared to be functioning. I guess that did surprise me a bit as I usually expect the worst for parts and systems that I haven’t gone over yet and that have been sitting for 15 years. I let the car idle and looked around the engine compartment. Everything appeared normal. This time it ran a bit longer and the idle smoothed out fairly well. After a minute or two it ran out of gas and stalled again.
Even though I had only been working for 15 minutes at the most I had to call it quits. I wanted to share my triumph with my family so I told one of my two sons. He gave me the thumbs up sign. He isn’t all that interested in cars but he knows how much it means to me so he acknowledged my small success. I even tried to tell my wife but she was only interested in her menu planning for the week. I know she doesn’t really like me working on my car but I had hoped for at least some small acknowledgement. At least she mentioned that she noticed a smell before she came into the house. I should consider that high praise coming from her. 🙂
All in all I’ll consider the day a success. Hopefully this will motivate me to keep the project moving forward. Time to plan out my next steps. Stay tuned for more, hopefully soon.
Getting It Running Part 2
I had a bit more free time and was anxious to get back to work on the car. My plan for this day was to get everything primed, reinstall the spark plugs, and fire up the engine. I got pretty close but didn’t quite make it there.
The first step was for me to move the car out of the garage. It was just too dark for me to see what I was doing, and I didn’t want to fill the place up with smoke when the car started up. So I cleared out everything behind the car and moved the shifter into neutral. Then I grabbed a pair of wheel chocks, got behind the car and started to pull. The car rolled very easily, which kind of surprised me. I moved it very slowly a foot or so at a time. My garage floor is level, but the driveway gradually slopes away from the garage. I went slow because I didn’t want the car to get away from me. Finally i had it out of the garage and put the wheel chocks behind the two rear wheels.
Since I didn’t have the fuel tank completely installed yet, I took a gas can and ran a fuel line from the can to the fuel pump. I figured that the fuel pump should be able to suction gas out of the can and pump it up to the carburetor. Since the spark plugs were still out my plan was to just prime the oil and fuel systems by cranking the engine for a minute or two. So I turned the key and started cranking away. The engine turned pretty fast and the oil pressure light went out. I held the key in the start position for about 10 seconds or so and then stopped. I repeated this 3 or 4 more times. Then I went to check the carburetor for fuel in the bowls. It was dry. I checked that my fuel line was still in place and tried again. This time I cranked the engine 15 to 20 seconds. That led me to discover another problem.
When I let go of the key to stop the starter motor it continued to crank the engine. I knew what the problem must be. So I got out of the car, grabbed a screwdriver while the engine continued to turn, and gave the starter solenoid a good whack with the screwdriver. The starter stopped turning. I got back in the car and tried again. After a few more tries the starter solenoid got stuck again. A good whack with the screwdriver stopped it once again. But it was obvious that the starter solenoid was sticking. It was also obvious that no gas was making its’ way to the carburetor. Time to take a break and rethink my strategy.
One thing I know for sure is that I need a new starter solenoid. I prefer to buy Ford starter solenoids so I gave the local dealer’s parts department a call. They told me they don’t stock them No big surprise there as the part hasn’t been used for decades. While he didn’t actually refuse to search for one he didn’t really offer any further assistance either. I told the parts person that I didn’t want an aftermarket part as they are all just so much junk. I’ve had some success with Ford Parts departments using those exact same words in the past. At that point I must have said the magic words and he said if I would like he could try and find one for me. He looked it up and found one in the warehouse. It would be in tomorrow. I told him I would be by in a day or two to pick it up.
I’m hoping that the fuel pump is OK and the reason no fuel made it to the carburetor was just that the engine wasn’t cranked for long enough or it was just too slow to suck in the gas. I plan to fill the fuel bowls through the vent tubes to prime the carburetor and hope that when it starts the fuel pump will do its’ job again. But that will have to wait until I get the new starter solenoid installed. I want to make sure I can stop the starter motor in case something goes wrong before I can give the solenoid another good whack to stop the starter. So the sound of a Ford big block engine will not be heard today.
I didn’t want to quit yet so I went ahead and reinstalled the spark plugs and wires. This went about as well as removing them did, which means it was a chore. But I got it all buttoned back up. Finally I pushed the car back into the garage. You’re probably wondering right about now what happened to the gas can. Yes, I did forget to move it and when I pushed the car back into the garage I spilled some gas. Now I need to wait for the garage to air out as well. That and buy some more gas. But next time I really hope to get the engine started up. Unfortunately we are expecting some bad weather the next few days. But I still hope to get some work done and move things a little bit farther forward.