
The weather is starting to get colder and the 2017 show season is almost over. The car performed fairly well this season, although I didn’t get to drive it as much as I would have liked to. I did get to make a longer trip to Cruisin Ocean City, which was about 500 miles round trip. The car does have some remaining issues I need to deal with, as well as some upgrades I’ve been hoping to perform. With the driving season coming to a close I need to prioritize what I want to accomplish over the winter.
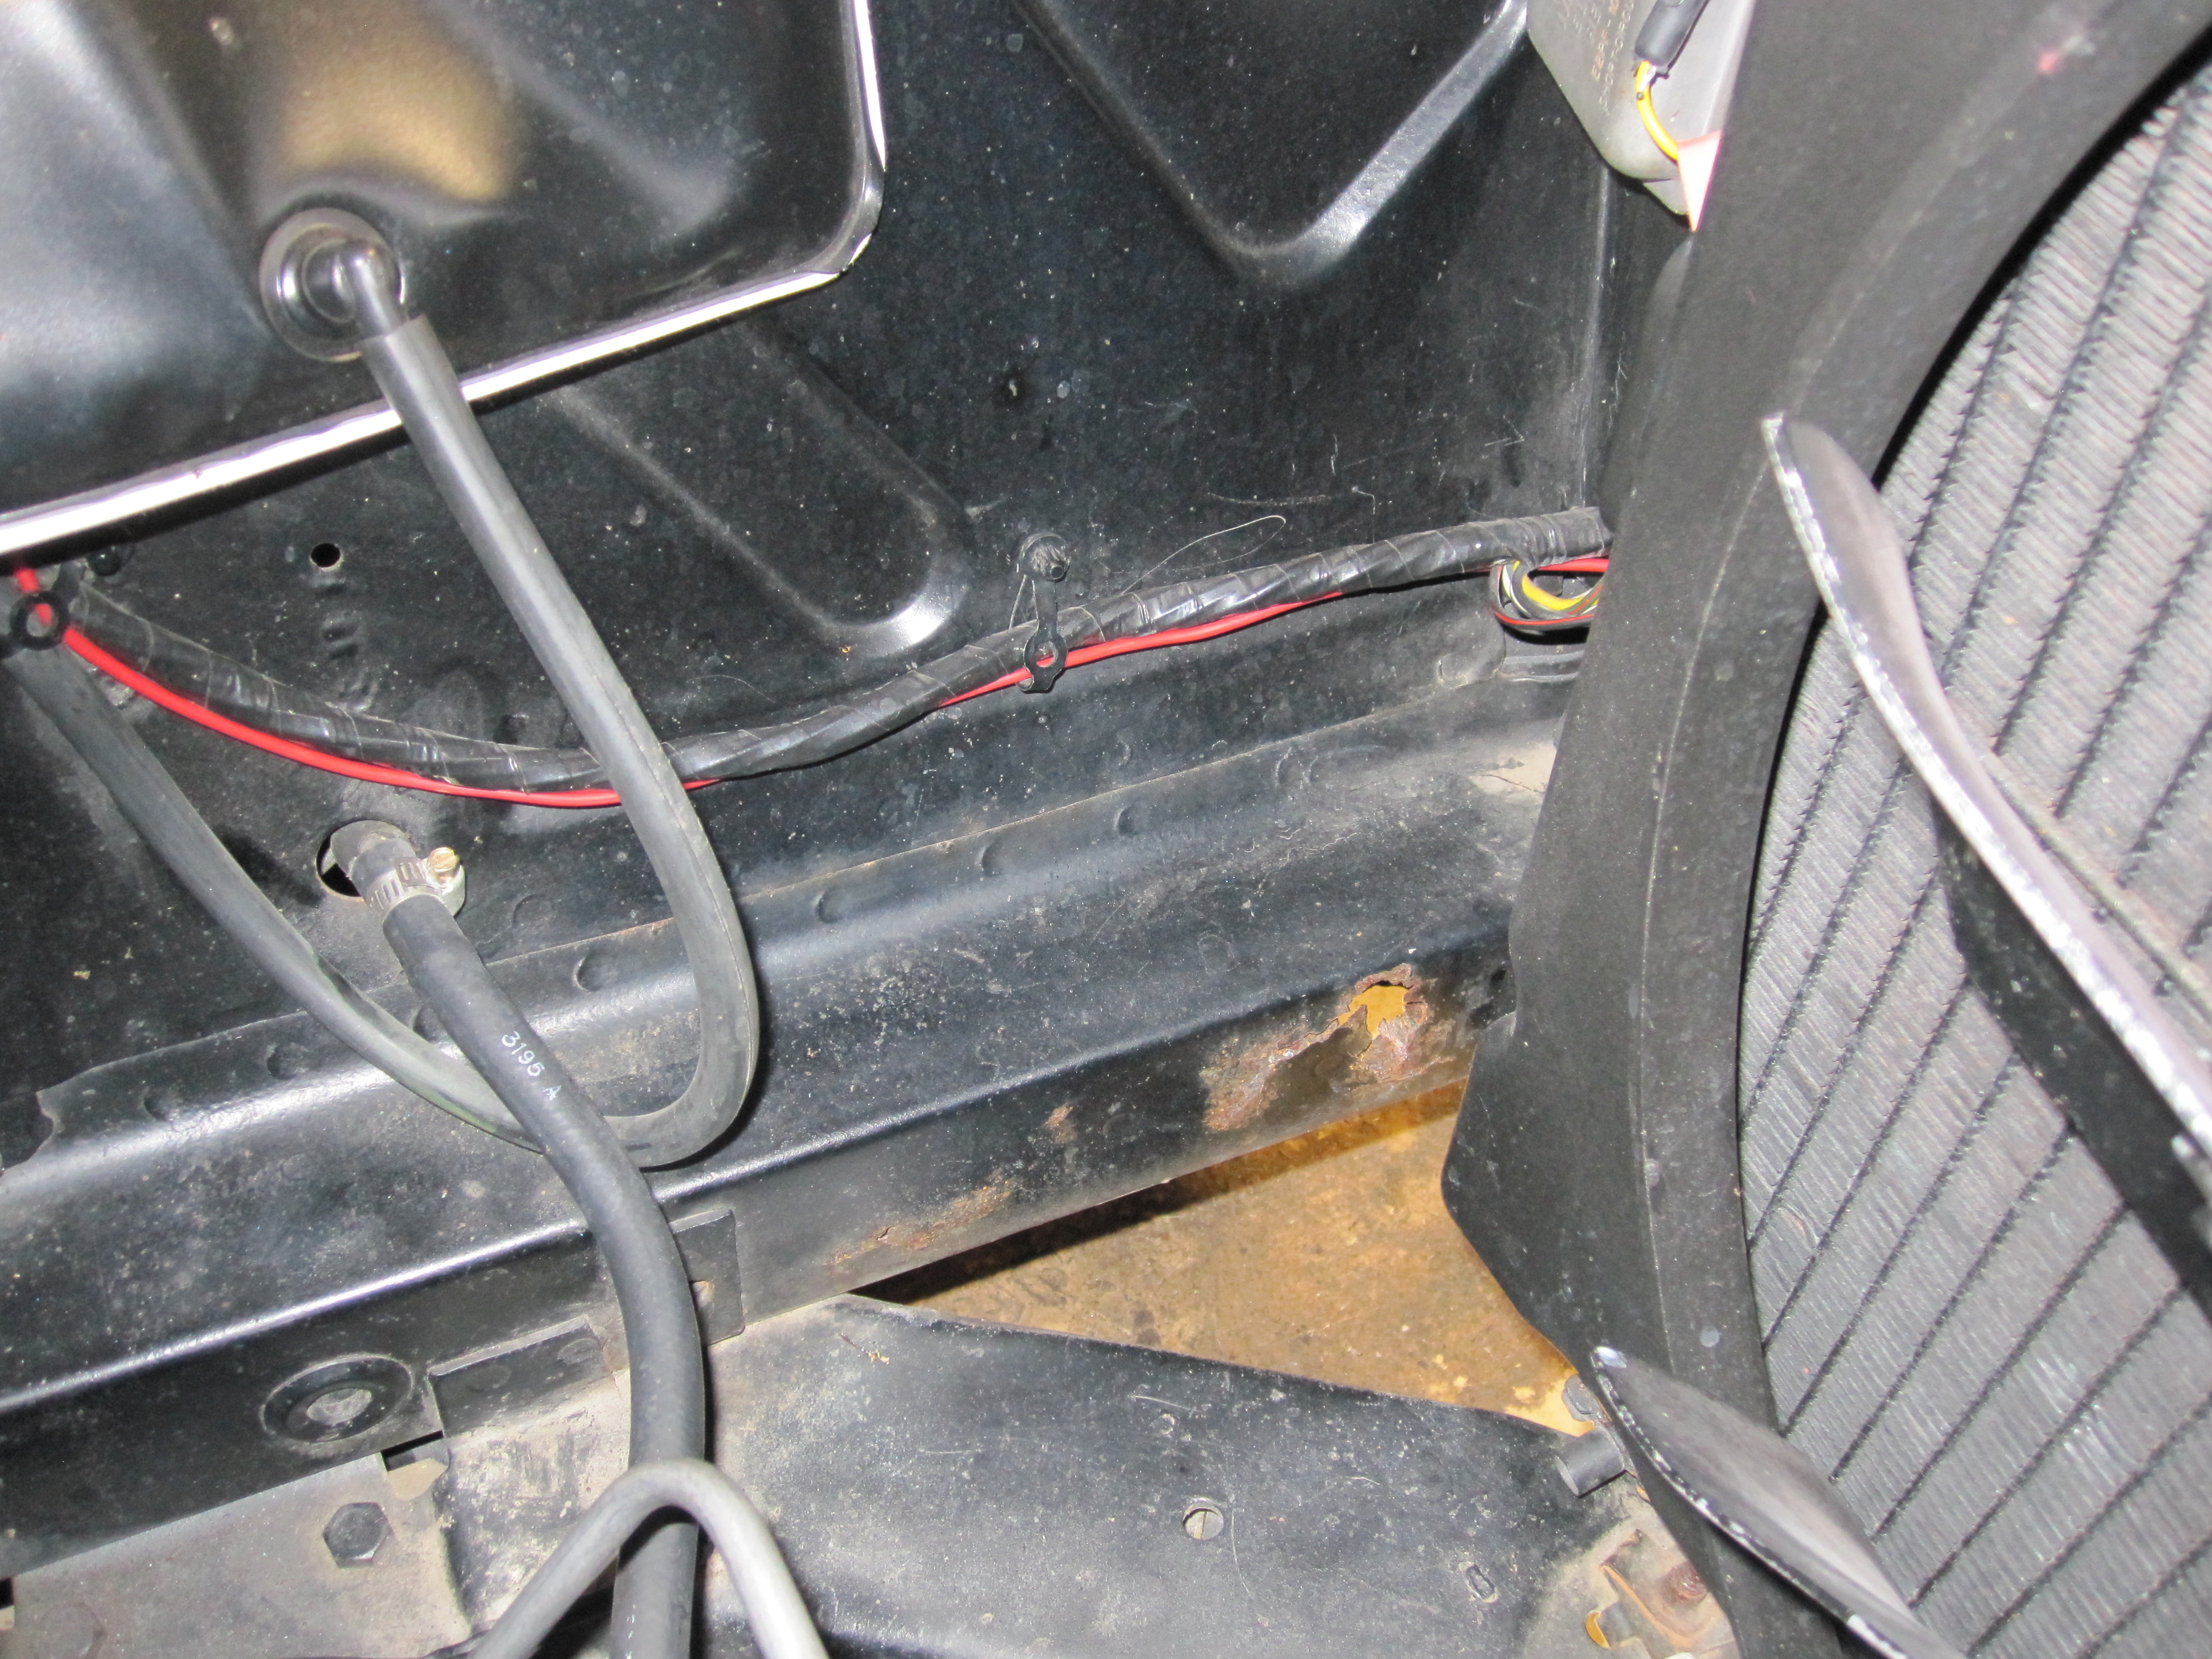
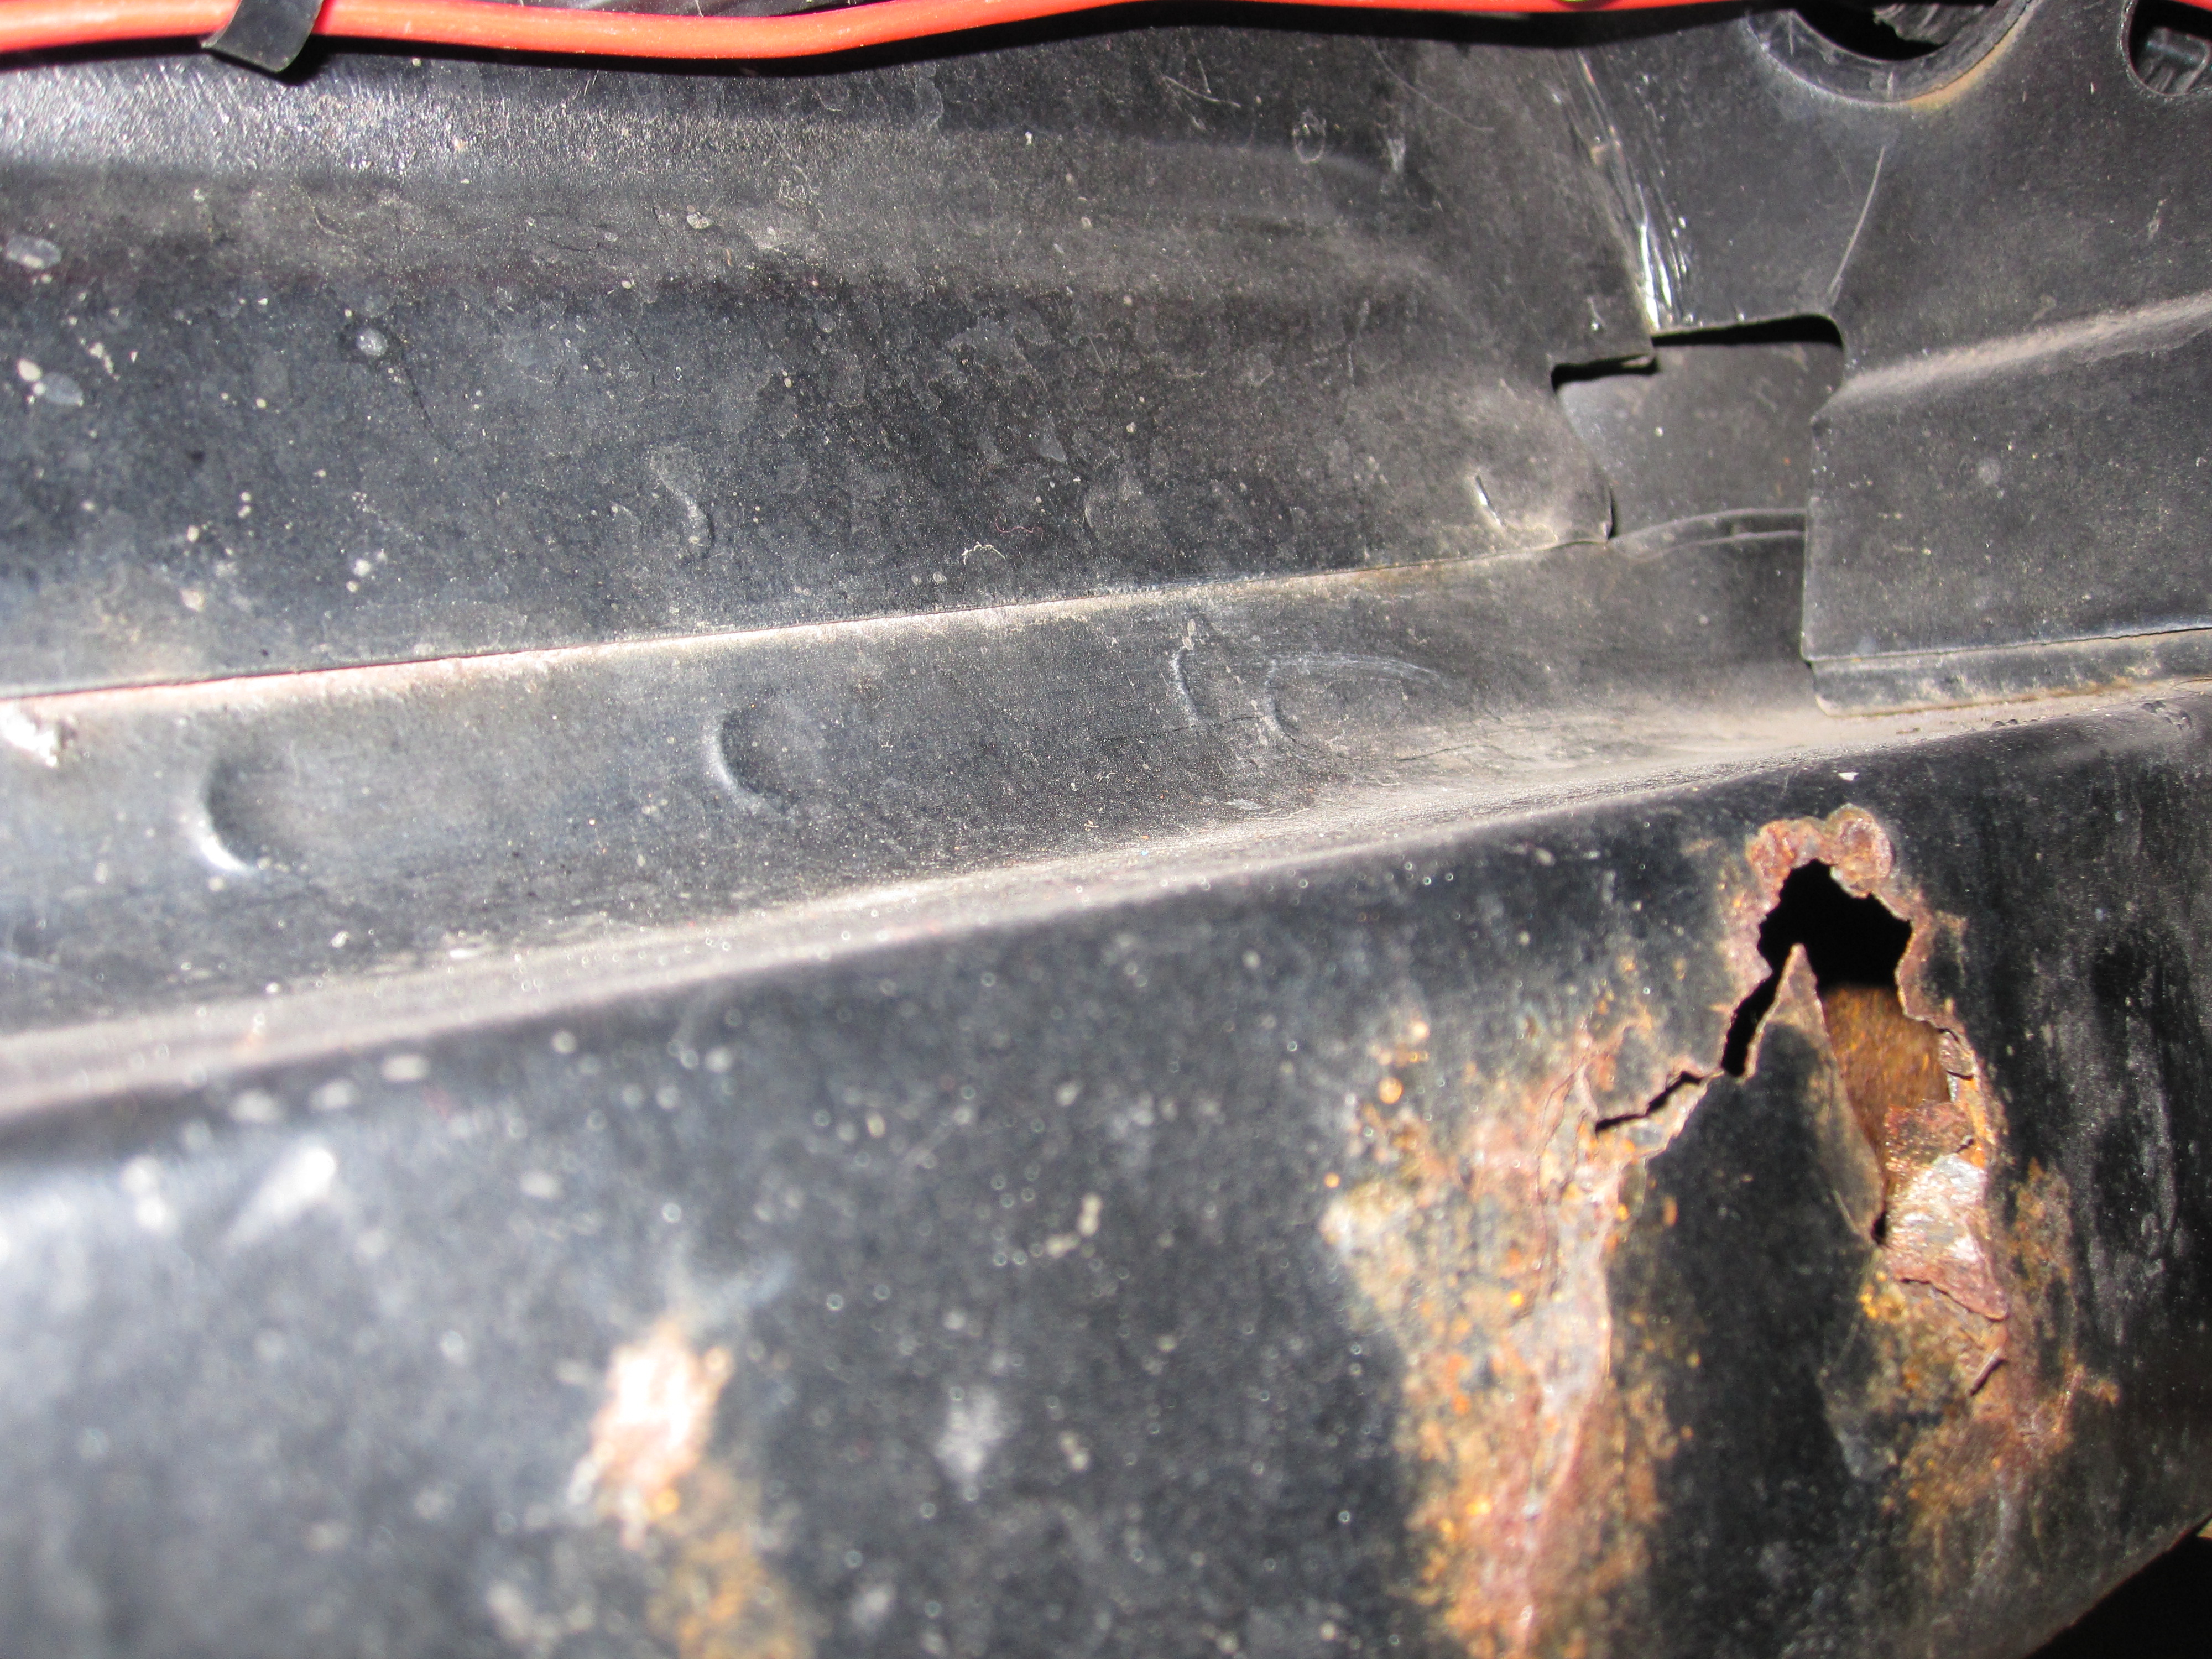
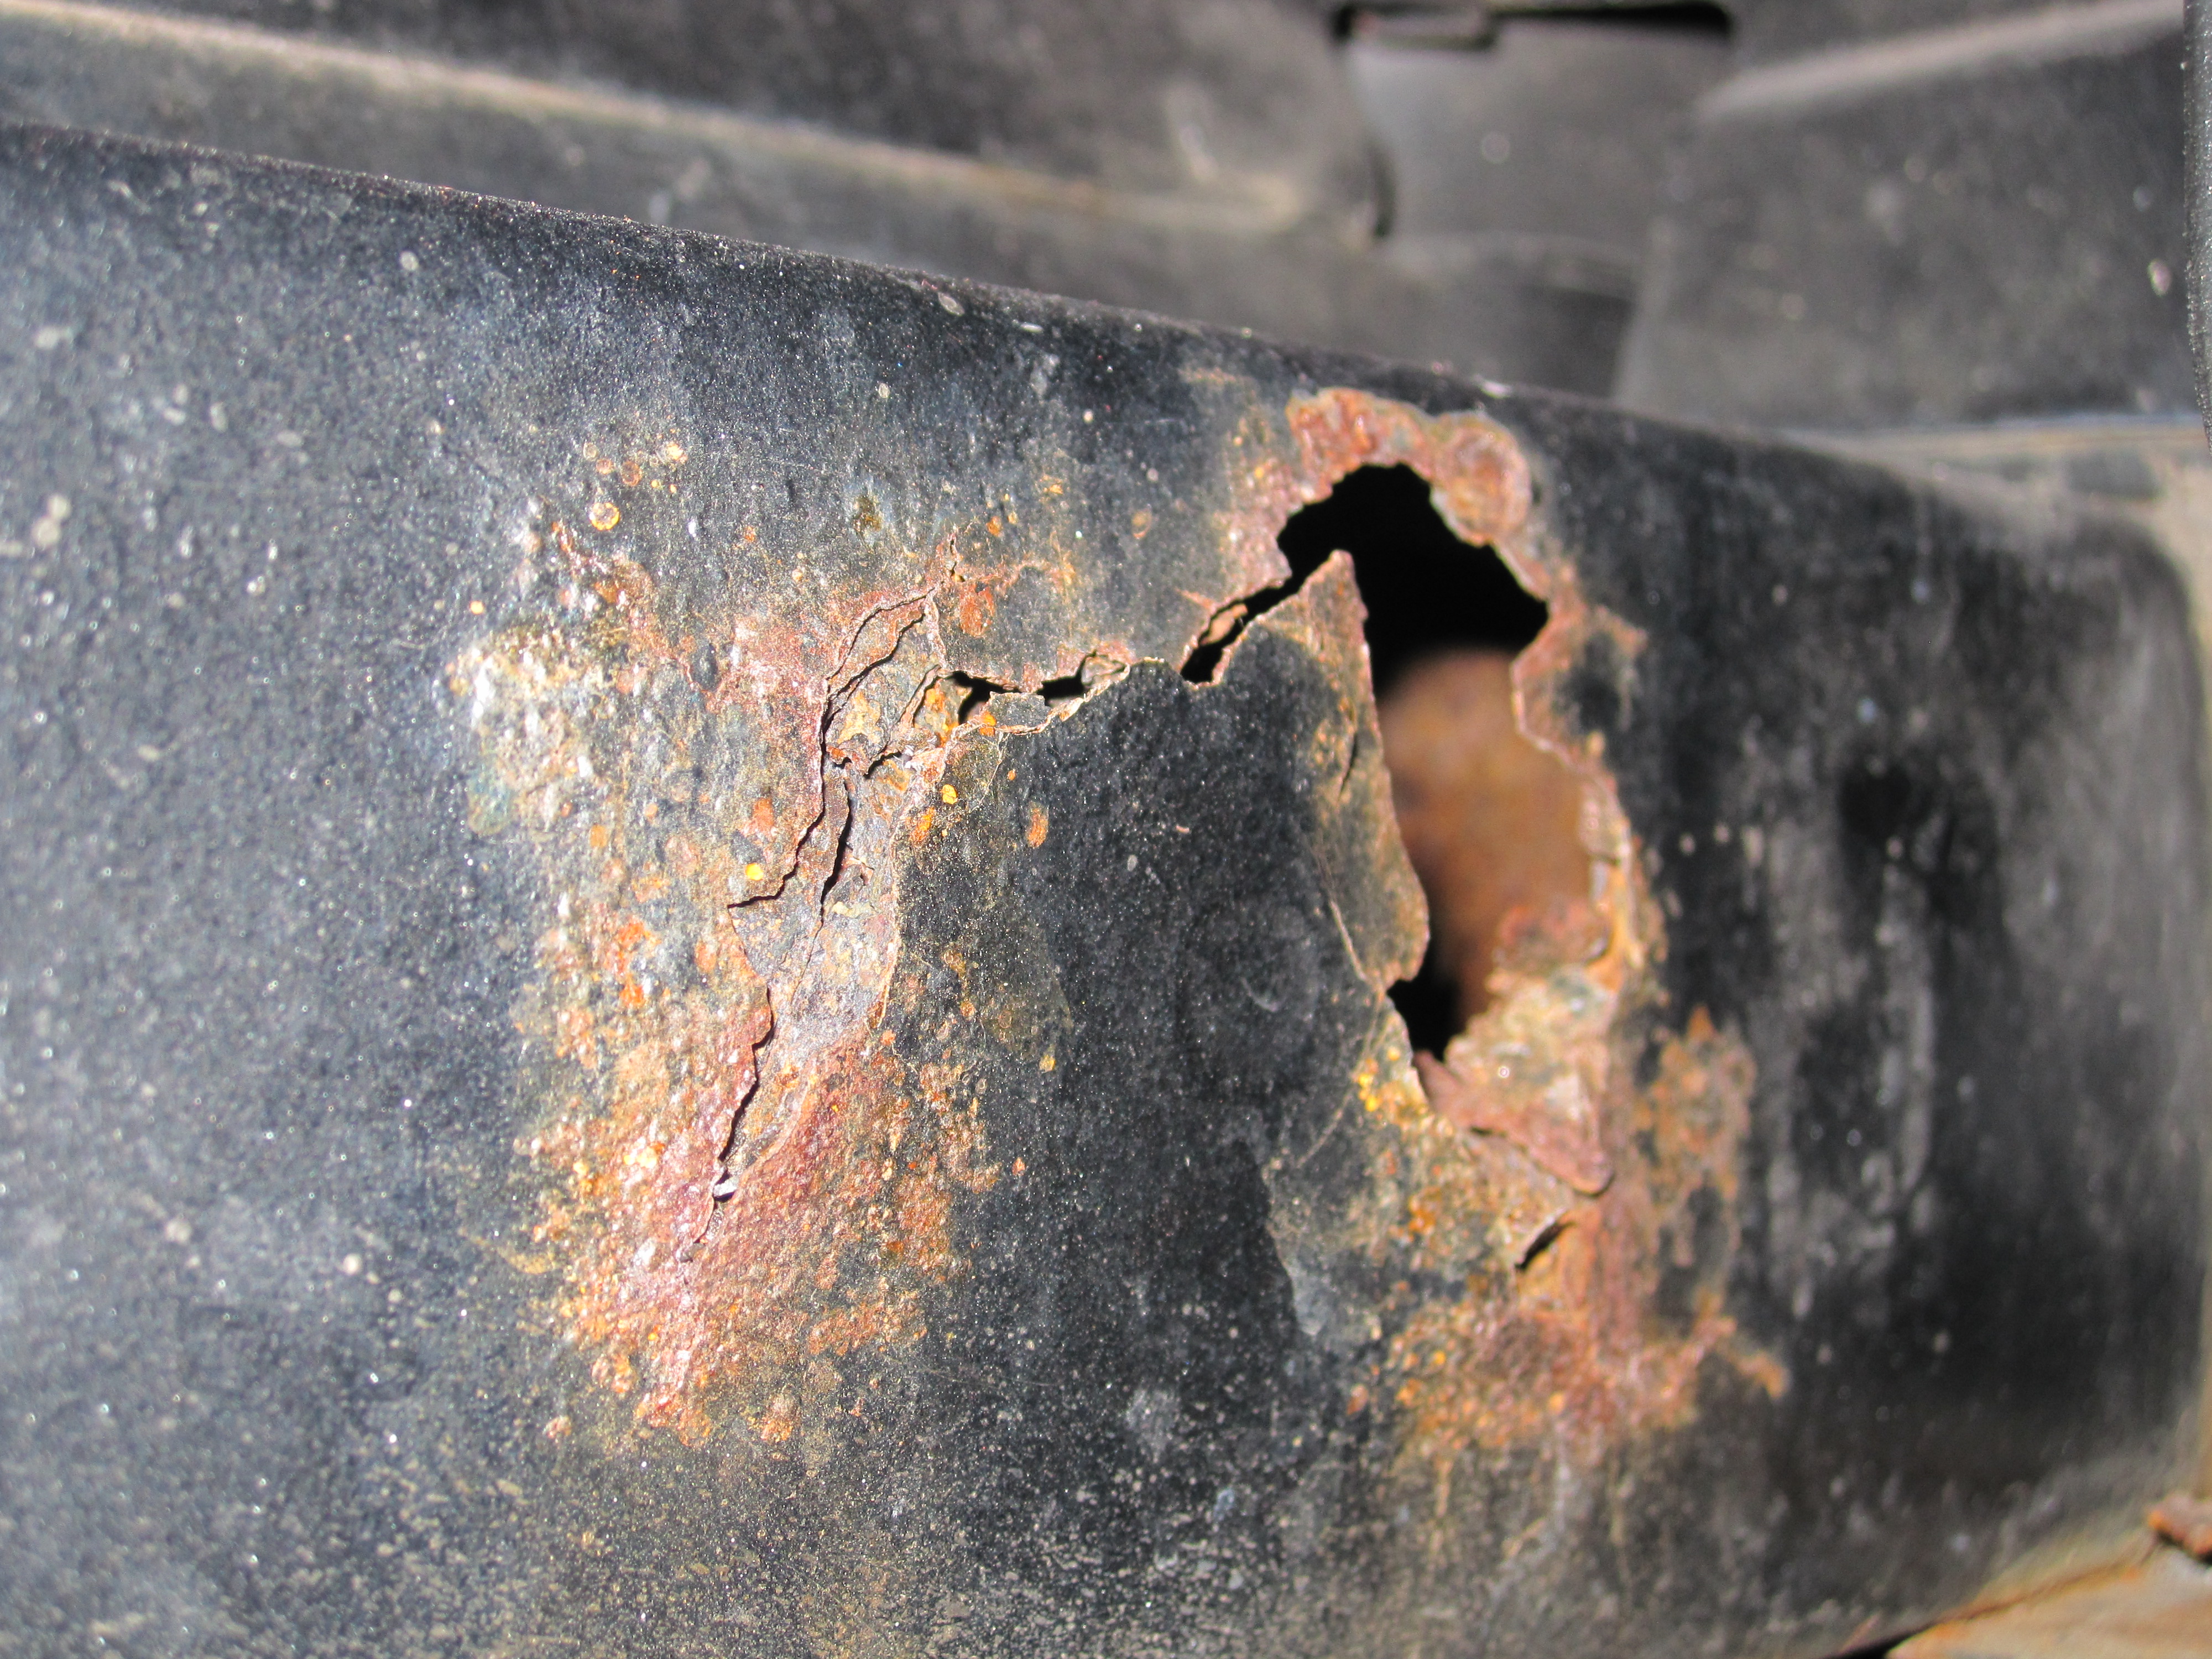
My highest priority is some rust repair on the front frame rails. I’ve already spent some time attempting to locate a shop willing to take on that type of repair. Most body shops aren’t willing to even look at the car, much less repair it. I did manage to find one shop that was willing to take on the job. A second shop also looked at the car, but the owner has some health issues and they have been very slow in getting back to me with answers to my questions. At this point it appears that the 1st shop will most likely get the job. But I’m not 100% decided yet.
Here are some pictures of the rusted frame rails.
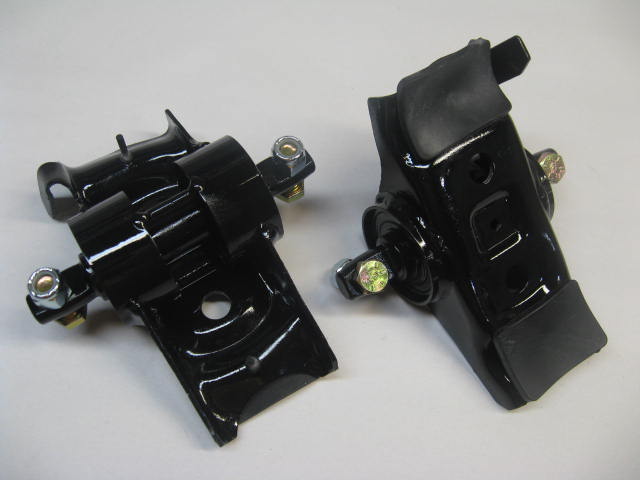
Other than the rust repair, my biggest issue is all of the squeaks and creaks coming from the front end of the car. The entire front end was rebuilt back in the mid 1990’s, just before the project went dormant for about 15 years or so. Even though the car was just sitting, it appears that the bushings in the coil spring seats has deteriorated, causing metal on metal contact. This has been an issue in the past, and I have replaced the spring seats more than once. The fix this time is to install new parts that use roller bearings rather than rubber bushings. This will eliminate the bushing that wears out and also permit the suspension to articulate more easily due to the reduced friction. I purchased my lower coil spring seats from OpenTracker Racing. Dazecars has a good explanation of how to build your own on his web site.
Here is a picture of the roller spring seats from OpenTracker Racing.
While the spring seat is being replaced I plan to also lower the upper control arms by 1 inch. This modification is commonly known as the Arning drop or the Shelby drop. This was a modification developed by a Ford engineer, Klaus Arning, and incorporated by Carrol Shelby into the early Shelby Mustangs. This modification raises the car’s roll center, which causes the car to resist body roll in turns. There are no downsides to the modification other than the need to have the front end aligned after the modification has been completed. Since I will be removing everything needed to perform the drop anyway, the job is all labor with no new parts required, and I need to have an alignment done after replacing the spring seats, it makes sense to do the modification along with the spring seats.
Here is a more detailed write-up of the Arning drop modification.
While I have the parts removed, I will inspect the front shocks and the upper control arms. If needed, I can have the shocks rebuilt.by Koni. If the control arms are bad, I can either get stock replacements, or go for a pair of roller bearing control arms. The roller bearing arms have the advantages of not requiring periodic lubrication and having less friction which will allow the front suspension to articulate more easily. The price difference is fairly significant, so if new arms are warranted I will need to give the choice some additional thought.
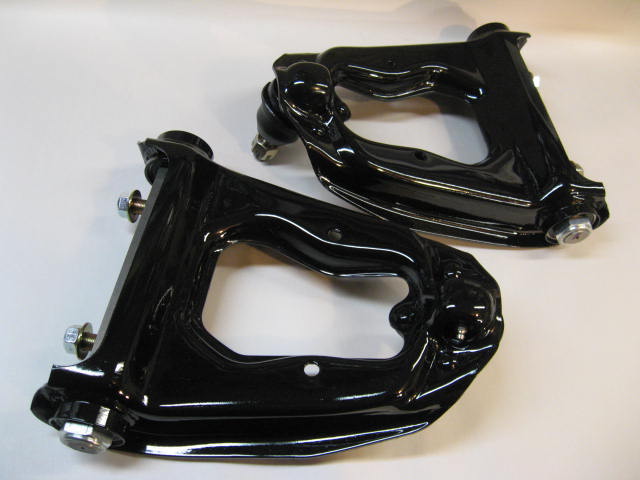
These are the roller upper control arms from OpenTracker Racing.
The last winter project I have planned is to complete my upgrade to LED lighting. Almost all of the exterior lighting is done except for the license plate light. None of the interior lighting has been addressed yet. I plan to replace the license plate bulb, the dome light bulb, and the three console light bulbs with equivalents LED bulbs. I also plan to install under dash lighting using LED bulbs and reproduction sockets similar to a factory option that was available in 1967. I already have the sockets and an assortment of LED bulbs to work with. I bought the bulbs based on a replacement chart on the manufacturer’s web site. However I don’t think I agree with some of the recommendations, so I may switch things up a bit. When I’m done, I will document my decisions in a future blog posting.

